VMware虚机通过宿主机的Clash访问外部站点
源起
在学习Kubernetes过程中,需要经常调用Github以及拉取镜像。一开始打算使用openwrt配置旁路由,然后使用openclash来实现访问外部。后来在实际搭配过程中发成本太高,本来内存就紧张,还需要单独拉出2G内存给虚机。所以,现在这里采用外部proxy代理的形式来实现正常访问互联网。
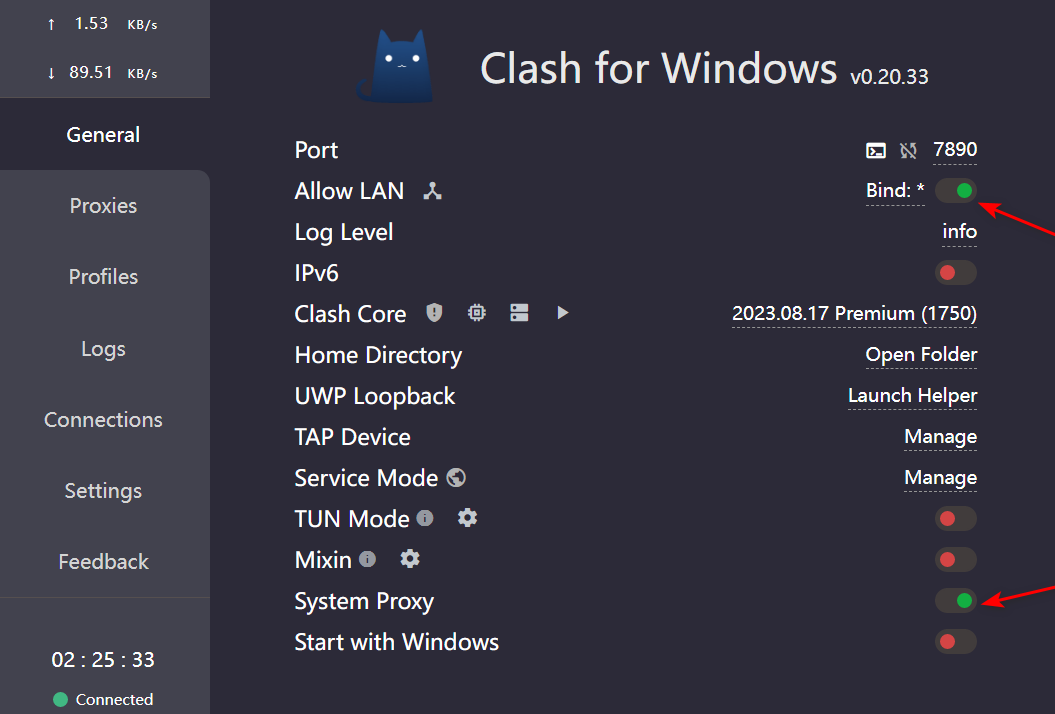
开启服务
允许局域网访问使用7890端口来提供网络代理服务。
配置访问
获取服务IP
此处的IP是宿主机的上网IP,而不是VMware Workstation的NAT网关地址。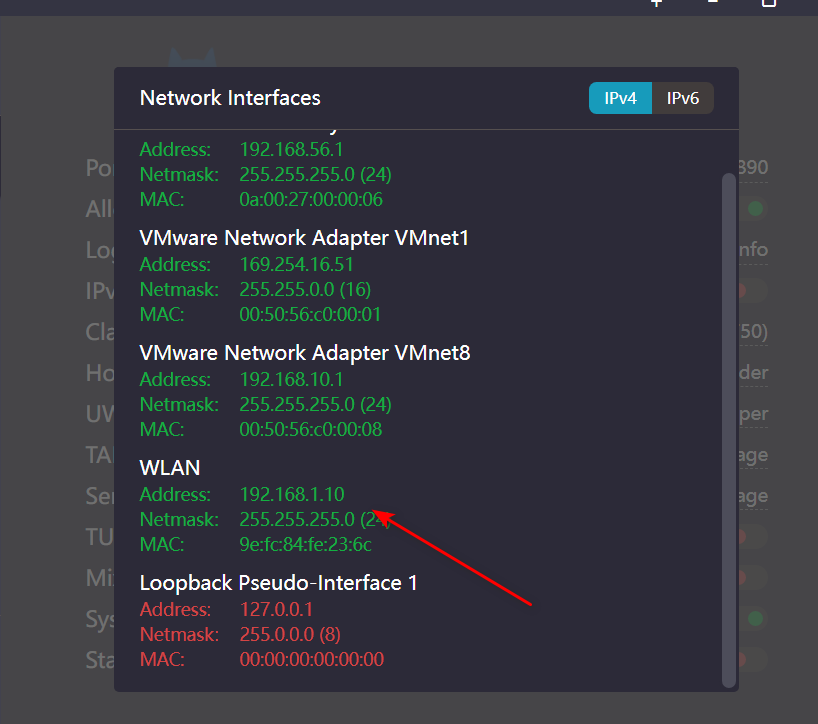
配置代理
直接配置系统代理
1 | cat >> ~/.bashrc << EOF |
使用脚本来实现代理
- 创建脚本 setproxy.sh
1
2
3
4
5
6
7
8
9
10
11
12
13
14
15
16
17
18
19
20
21
22
23
24
25
26
27
28
29
30
31
32
33
34
35
36
37!/bin/bash
encoding: utf-8
Proxy_IP=192.168.1.10
Proxy_Port=7890
Set System Proxy
function xyon(){
export https_proxy=http://$Proxy_IP:$Proxy_Port
export http_proxy=http://$Proxy_IP:$Proxy_Port
export all_proxy=socks5://$Proxy_IP:$Proxy_Port
echo -e "System Proxy is $Proxy_IP:$Proxy_Port"
}
unSet System Proxy
function xyoff(){
unset all_proxy
unset https_proxy
unset http_proxy
echo -e "System Proxy is Disabled"
}
Default Function is Set Proxy
if [ $# != 0 ]
then
if [ $1 == 'off' ]
then
xyoff
elif [ $1 == 'on' ]
then
xyon
else
echo "Please Input on or off!"
fi
else
echo "Please input command."
fi - 调用脚本
1
2
3
4
5
6
chmod +x setproxy.sh
因为父子shell的问题,使用source来使得脚本设置来修改当前父Shell环境变量
开启代理
source setproxy.sh on
关闭代理
source setproxy.sh off
All articles on this blog are licensed under CC BY-NC-SA 4.0 unless otherwise stated.