Hyper-V的使用技巧
|Word Count:1.9k|Reading Time:8mins|Post Views:
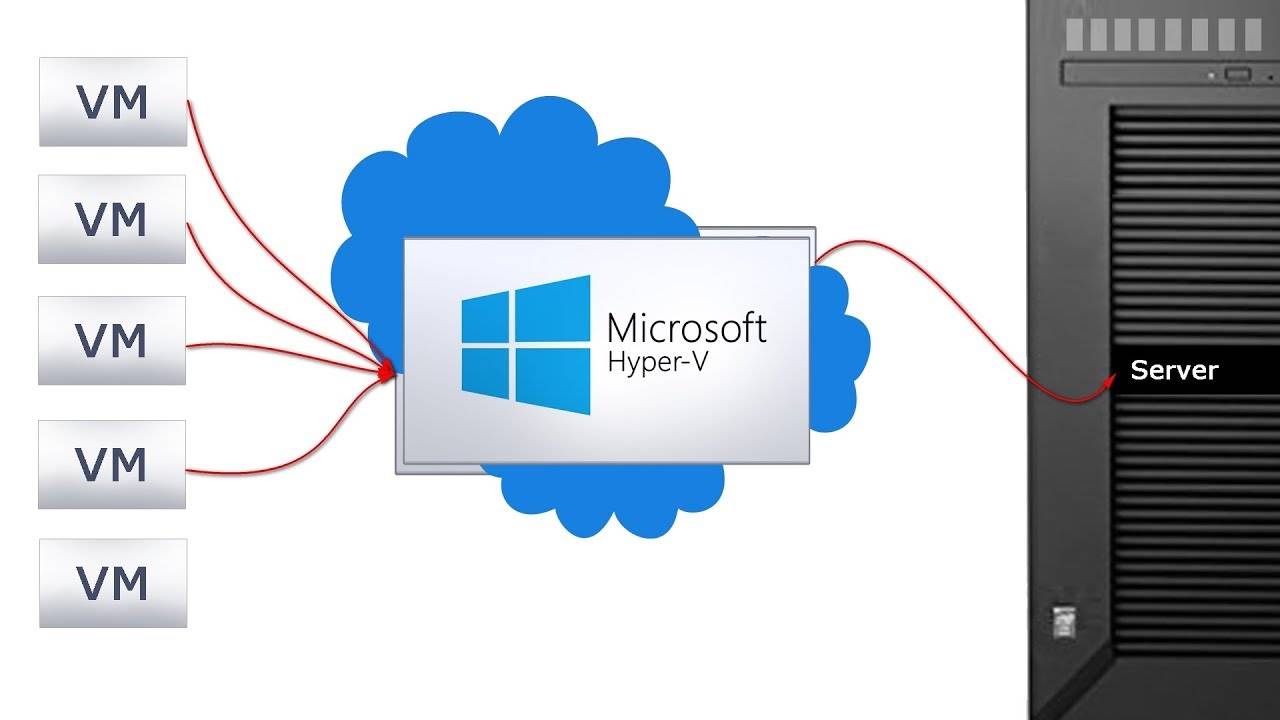
我日常在WSL+VMware Workstation环境中发现,虽然当前环境已经解决了多品牌虚拟化的问题,但还是经常会出现CPU飙升、内核报错的问题。最后,还是决定全盘Hyper-V化。

功能启用
帮助文档
- Microsoft Learn站点:Windows Server Hyper-V 和虚拟化
- 官方文档:Windows上的Hyper-V
- 常用命令:Hyper-V Commands
- WSL使用帮助:适用于 Linux 的 Windows 子系统文档
- Windows命令行:命令行博客
功能开启
1
2
3
4
5
6
|
Install-WindowsFeature -Name Hyper-V -ComputerName $Env:COMPUTERNAME -IncludeManagementTools
Enable-WindowsOptionalFeature -FeatureName 'Microsoft-Hyper-V-Tools-All' -Online
Get-WindowsFeature -ComputerName $Env:COMPUTERNAME
|
网络配置
由于Windows 10 上默认的Default Switch不可管理和卸载,同时默认交换机的IP地址是一直变化的,所以需要创建一个内部网络,搭配自定义路由来实现网络管理。
1
| New-VMSwitch -Name PublicSwtich -SwitchType Internal
|
另外,我们创建的内部网络PublicSwitch默认是没有DHCP并且在宿主机上添加的网卡是没有IP地址,所以可以使用ikuai之类的软路由进行管理。
虚机管理
示例来源:Manage Hyper-V Virtual Machines with PowerShell
基本命令
1
2
3
4
5
6
7
8
9
10
11
12
13
14
15
16
17
18
19
20
21
22
23
24
25
26
27
28
29
30
31
32
33
34
35
|
New-VM -Name "MyVM" -MemoryStartupBytes 4GB -Generation 2 -Path "C:\VMS\" -NewVHDPath "C:\VMS\MyVM\disk.vhdx" -NewVHDSizeBytes 60GB -SwitchName "External Virtual Switch"
New-VM -Name "MyVM" -MemoryStartupBytes 4GB -Generation 1 -Path "C:\VMS\" -NewVHDPath "C:\VMS\MyVM\disk.vhdx" -NewVHDSizeBytes 60GB -SwitchName "External Virtual Switch"
New-VM -Name "MyVM" -MemoryStartupBytes 4GB -Generation 2 -Version 8.0 -Path "C:\VMS\" -NewVHDPath "C:\VMS\MyVM\disk.vhdx" -NewVHDSizeBytes 60GB -SwitchName "External Virtual Switch"
Set-VM -Name "MyVM" -ProcessorCount 2
Set-VM -Name "MyVM" -MemoryStartupBytes 8GB
Set-VM -Name "MyVM" -NewVMName "MyNewVM"
Start-VM -VMName "MyVM"
Stop-VM -VMName "MyVM"
Stop-VM -VMName "MyVM" -TurnOff
Restart-VM -VMName "MyVM"
Remove-VM -Name "MyVM"
$vm = get-vm "MyVM"; $vmpath = $vm.path; Remove-Item $vm.HardDrives.path -Force ; Remove-VM $vm -Force ; Remove-Item $vmpath -Recurse -Force
|
进阶管理
1
2
3
4
5
6
7
8
9
10
11
12
13
14
15
16
17
18
19
20
21
22
23
24
25
26
27
28
29
30
31
32
33
34
35
36
37
38
39
40
41
|
Set-VMDvdDrive Name "MyVM" -ControllerNumber 1 -ControllerLocation 0 -Path "C:\ISO\Windowsserver2022.iso"
$vmDVDDrive = Get-VMDvdDrive -VMName "MyVM"; Set-VMFirmware -VMName "MyVM" -FirstBootDevice $vmDVDDrive
Get-VMDvdDrive -VMName "MyVM" | Set-VMDvdDrive -Path $null
Move-VMStorage "MyVM" -DestinationStoragePath D:\MyVM
Export-VM -Name "MyVM" -Path "C:\VMS\"
Checkpoint-VM -Name "MyVM" -SnapshotName "Before applying .NET updates"
Restore-VMCheckpoint -Name "Before applying .NET updates" -VMName "MyVM" -Confirm:$false
Rename-VMCheckpoint -VMName "MyVM" -Name "Before applying .NET updates" -NewName "MyNewCheckpointName"
Remove-VMCheckpoint -VMName "MyVM" -Name "MyNewCheckpointName"
Get-VMSnapshot -VMName "MyVM" | Remove-VMSnapshot
Add-VMHardDiskDrive -VMName "MyVM" -Path "C:\VMS\MyVM\data_disk_02.vhdx"
Remove-VMHardDiskDrive -VMName "MyVM" -ControllerType "SCSI" -ControllerNumber 0 -ControllerLocation 2
$vm = get-vm "MyVM"; Resize-VHD -Path $vm.HardDrives.path -SizeBytes 150GB
Get-VM -VMName "MyVM" | Select * | Out-GridView
|
高阶命令
1
2
3
4
5
6
7
8
9
10
11
|
Enter-PSSession -VMName "MyVM" -Credential (Get-Credential)
Set-VMProcessor -VMName "MyVM" -ExposeVirtualizationExtensions $true; Set-VMNetworkAdapter -VMName "MyVM" -MacAddressSpoofing On
Get-VMDvdDrive -VMName * | Where-Object {$_.DvdMediaType -eq 'ISO'}
Get-VM * | Select-Object VMName,CreationTime | Sort-Object CreationTime
|
虚机部署
图形化部署
略
脚本部署
开启脚本执行权限
1
2
|
Set-ExecutionPolicy AllSigned
|
创建部署脚本
1
2
3
4
5
6
7
8
9
10
11
12
13
14
15
16
17
18
19
20
21
22
23
24
25
26
27
28
29
30
31
32
33
34
35
36
37
38
39
40
41
42
43
44
45
46
47
48
49
50
51
52
53
54
55
56
57
58
59
60
61
62
63
64
|
Write-Host -NoNewline -ForegroundColor Magenta '请输入要创建的虚机名称(如:Master***)'
[String]$VM_Name = Read-Host
Write-Host -NoNewline -ForegroundColor Magenta '请输入需要放在哪台宿主机上(如:T14GEN4)'
[String]$VM_HostName= Read-Host
Write-Host -NoNewline -ForegroundColor Magenta '请输入虚机vCPU核数?直接回车默认是2vCPU(如:2 回车 )'
[int16]$VM_CpuCount= Read-Host
Write-Host -NoNewline -ForegroundColor Magenta '请输入虚机Memory大小?直接回车默认是4GB(如:4 回车 )'
[int64]$VM_Memory= Read-Host
$VM_Name=$VM_Name.toUpper()
$VM_HostName=$VM_HostName.toUpper()
if ([int16]$VM_CpuCount -eq '0')
{$VM_CpuCount=2}
Else
{ }
if ($VM_Memory -eq ' ')
{$VM_Memory=4
$VM_Memory=$VM_Memory*1GB
}
Else
{$VM_Memory=$VM_Memory*1GB}
$Template_VHDX = "SERVICE.vhdx"
$VM_HostName = $Env:COMPUTERNAME
$NetworkSwitch=(Get-VMSwitch | Where-Object {$_.Name -match 'PublicSwitch'}).Name
$Template_VHDX_FilePath = "D:\Virtual_Disks\"
$VM_Path = 'D:\Virtual_Machines'
$VM_RemotePath = "D:\Virtual_Machines"
$VM_VHDPath = $VM_Path + '\' + $VM_Name + '\Virtual Hard Disks\'+ $VM_Name + '.vhdx'
$VM_VHDRemotePath = $VM_RemotePath + '\' + $VM_Name + '\Virtual Hard Disks\' + $VM_Name + '.vhdx'
New-item -path $VM_RemotePath\$VM_Name -name "Virtual Hard Disks" -type directory |Out-Null
Copy-Item -Path $Template_VHDX_FilePath\$Template_VHDX -Destination $VM_VHDRemotePath |Out-Null
$VM_Mem=$VM_Memory/1GB
Write-Host -ForegroundColor White "Gather info VMName: $VM_Name,HostName: $VM_HostName,Memory:$VM_Mem GB,vCPU:$VM_CpuCount,OSVersion:RockyLinux9"
New-VM –Name $VM_Name -ComputerName $VM_HostName –Generation 1 -MemoryStartupBytes $VM_Memory -BootDevice VHD -SwitchName $NetworkSwitch –Path $VM_Path -VHDPath $VM_VHDPath |Out-Null
Set-VM -Name $VM_Name -ComputerName $VM_HostName -ProcessorCount $VM_CpuCount
Enable-VMIntegrationService -Name "来宾服务接口" -VMName $VM_Name
Set-VMMemory -VMName $VM_Name -ComputerName $VM_HostName -DynamicMemoryEnabled $False
Set-VM -VMName $VM_Name -AutomaticCheckpointsEnabled $False
Start-VM -Name $VM_Name -ComputerName $VM_HostName
|
使用技巧
WSL
部署
1
2
| wsl --install
wsl --update
|
重启
关闭/etc/hosts自动刷新
1
2
3
4
5
|
cat >>/etc/hosts <<EOF
[network]
generateHosts = false
EOF
|
部署ALmaLinux9
使用微软Store来部署 Microsoft|Store
激活
Hyper-V主机能够不依赖网络KMS来实现自动激活宿主机的虚机。
前提
- 使用数据中心版的Windows Server(2012、2016、2019、2022)
- 启动了Hyper-V的角色
AVMA Key
AVMA (Automatic Virtual Machine Activation) 自动实现虚机批量自动激活的特定机制,就是该宿主机配置AVMA key之后,该主机上的所有Hyper-V虚机自动激活,无需额外配置。
使用方法:
常用Key
- AVMA keys for Windows Server 2019.
| Edition |
AVMA key |
| Datacenter |
H3RNG-8C32Q-Q8FRX-6TDXV-WMBMW |
| Standard |
TNK62-RXVTB-4P47B-2D623-4GF74 |
| Essentials |
2CTP7-NHT64-BP62M-FV6GG-HFV28 |
- AVMA keys for Windows Server version 1809.
| Edition |
AVMA key |
| Datacenter |
H3RNG-8C32Q-Q8FRX-6TDXV-WMBMW |
| Standard |
TNK62-RXVTB-4P47B-2D623-4GF74 |
- AVMA keys for Windows Server 2016.
| Edition |
AVMA key |
| Datacenter |
TMJ3Y-NTRTM-FJYXT-T22BY-CWG3J |
| Standard |
C3RCX-M6NRP-6CXC9-TW2F2-4RHYD |
| Essentials |
B4YNW-62DX9-W8V6M-82649-MHBKQ |
- AVMA keys for Windows Server 2012R2.
| Edition |
AVMA key |
| Datacenter |
Y4TGP-NPTV9-HTC2H-7MGQ3-DV4TW |
| Standard |
DBGBW-NPF86-BJVTX-K3WKJ-MTB6V |
| Essentials |
K2XGM-NMBT3-2R6Q8-WF2FK-P36R2 |
其他
以下是两个写的很好的Hyper-V MVP的blog:
- GEORGE MARKOU
- THOMAS MAURER (这位是Azure混合云的老大)
- Charbelnemom、


