内核虚拟化KVM的使用
概念
KVM全称为Kernel Virtual Machine内核虚拟机,它是硬件辅助的全虚拟化解决方案,支持x86架构,并已移植到ARM、MIPS、PowerPC等架构。KVM作为可加载的内核模块包含在Linux内核之中,除了通用模块kvm.ko外,针对不同的CPU还有不同的模块,例如针对Intel的CPU的kvm-intel.ko,针对AMD的kvm-amd.ko.
KVM的体系结构的核心是一组实现虚拟化功能的Linux内核模块,包括提供虚拟化能力的kvm.ko,还包括特定CPU的模块和管理中断、时钟等设备管理模块。而其他设备例如网卡、显卡、存储控制器和磁盘则由QEMU(Quick Emulator)来负责。它通过/dev/kvm接口设置一个Guest操作系统的地址空间,从而提供模拟的I/O设备。Libvirt是管理虚拟机和其他虚拟化功能的软件集合,包括API库、守护进程(libvirtd)和其他工具,它在KVM解决方案中扮演管理工具的角色。
入门
创建虚机
准备安装
以Rocky Linux 8为例,需要准备一台对应虚机,并开启相关嵌套虚拟化功能。
# 最小虚拟化宿主环境,仅包括libvirt和qemu-kvm
yum group install -y virtualization-hypervisor
# 用于访问和控制虚拟机以及容器的接口,包括libvirt客户端
yum group install -y virtualization-platform
# 离线管理虚拟映像的工具,包括libguestfs和virtio-win
yum group install -y virtualization-tools
systemctl reboot
如果需要图形化桌面管理工具,还需要附加执行以下命令
# 安装桌面
yum group install -y gnome-desktop
# 安装管理工具
yum group install -y virtualization-client
安装完成之后,可以进行以下检查
# 查看虚拟机网桥是否建立
[root@kvm1 ~]# ifconfig
ens160: flags=4163<UP,BROADCAST,RUNNING,MULTICAST>  mtu 1500
lo: flags=73<UP,LOOPBACK,RUNNING>  mtu 65536
virbr0: flags=4099<UP,BROADCAST,MULTICAST>  mtu 1500
        inet 192.168.122.1  netmask 255.255.255.0  broadcast 192.168.122.255
        ether 52:54:00:16:e8:45  txqueuelen 1000  (Ethernet)
# 检查虚拟化后台服务
[root@kvm1 ~]# systemctl status libvirtd
● libvirtd.service - Virtualization daemon
   Loaded: loaded (/usr/lib/systemd/system/libvirtd.service; enabled; vendor preset: enabled)
   Active: active (running) since Tue 2023-05-23 18:33:29 CST; 24s ago
     Docs: man:libvirtd(8)
           https://libvirt.org
 Main PID: 1362 (libvirtd)
# 检查CPU特性开启情况
[root@kvm1 ~]# egrep '(vmx|svm)' /proc/cpuinfo
flags		: fpu vme de pse tsc msr pae mce cx8 apic sep mtrr pge mca cmov pat pse36 clflush mmx fxsr sse sse2 ss ht syscall nx pdpe1gb rdtscp lm constant_tsc arch_perfmon nopl xtopology tsc_reliable nonstop_tsc cpuid pni pclmulqdq vmx ssse3 fma cx16 pcid sse4_1 sse4_2 x2apic movbe popcnt tsc_deadline_timer aes xsave avx f16c rdrand hypervisor lahf_lm abm 3dnowprefetch cpuid_fault invpcid_single pti ssbd ibrs ibpb stibp tpr_shadow vnmi ept vpid ept_ad fsgsbase tsc_adjust bmi1 avx2 smep bmi2 invpcid rdseed adx smap clflushopt xsaveopt xsavec xgetbv1 xsaves arat md_clear flush_l1d arch_capabilities
# 检查虚拟化功能
[root@kvm1 ~]# virt-host-validate
  QEMU: Checking for hardware virtualization                                 : PASS
  QEMU: Checking if device /dev/kvm exists                                   : PASS
  QEMU: Checking if device /dev/kvm is accessible                            : PASS
  QEMU: Checking if device /dev/vhost-net exists                             : PASS
  QEMU: Checking if device /dev/net/tun exists                               : PASS
  QEMU: Checking for cgroup 'cpu' controller support                         : PASS
  QEMU: Checking for cgroup 'cpuacct' controller support                     : PASS
  QEMU: Checking for cgroup 'cpuset' controller support                      : PASS
  QEMU: Checking for cgroup 'memory' controller support                      : PASS
  QEMU: Checking for cgroup 'devices' controller support                     : PASS
  QEMU: Checking for cgroup 'blkio' controller support                       : PASS
  QEMU: Checking for device assignment IOMMU support                         : PASS
  QEMU: Checking if IOMMU is enabled by kernel                               : WARN (IOMMU appears to be disabled in kernel. Add intel_iommu=on to kernel cmdline arguments)
  QEMU: Checking for secure guest support                                    : WARN (Unknown if this platform has Secure Guest support)
IOMMU(输入输出内存管理单元)可以把设备访问的虚拟地址转化为物理地址。在虚拟化中,开启这个功能后可以启用PCI直通(PCI Passthrough),从而允许虚拟机直接调用主机设备,例如网卡、显卡等。
# 在内核启动选项中添加 intel_iommu=on
[root@kvm1 ~]# vim /etc/default/grub
GRUB_CMDLINE_LINUX="crashkernel=auto resume=/dev/mapper/rl_rocky-swap rd.lvm.lv=rl_rocky/root rd.lvm.lv=rl_rocky/swap intel_iommu=on"
# 重新生成引导器配置文件
[root@kvm1 ~]# grub2-mkconfig -o /boot/grub2/grub.cfg
[root@kvm1 ~]# systemctl reboot
[root@kvm1 ~]# virt-host-validate
  QEMU: Checking for hardware virtualization                                 : PASS
  QEMU: Checking if device /dev/kvm exists                                   : PASS
  QEMU: Checking if device /dev/kvm is accessible                            : PASS
  QEMU: Checking if device /dev/vhost-net exists                             : PASS
  QEMU: Checking if device /dev/net/tun exists                               : PASS
  QEMU: Checking for cgroup 'cpu' controller support                         : PASS
  QEMU: Checking for cgroup 'cpuacct' controller support                     : PASS
  QEMU: Checking for cgroup 'cpuset' controller support                      : PASS
  QEMU: Checking for cgroup 'memory' controller support                      : PASS
  QEMU: Checking for cgroup 'devices' controller support                     : PASS
  QEMU: Checking for cgroup 'blkio' controller support                       : PASS
  QEMU: Checking for device assignment IOMMU support                         : PASS
  QEMU: Checking if IOMMU is enabled by kernel                               : PASS
可以使用远程SSH服务直接登录服务器进行管理,或者使用Cockpit这个面板进行管理。
# 启用cockpit网页管理终端
yum install -y cockpit cockpit-machines cockpit-session-recording.noarch cockpit-storaged cockpit-pcp
systemctl enable --now cockpit.socket
网页端部署虚机
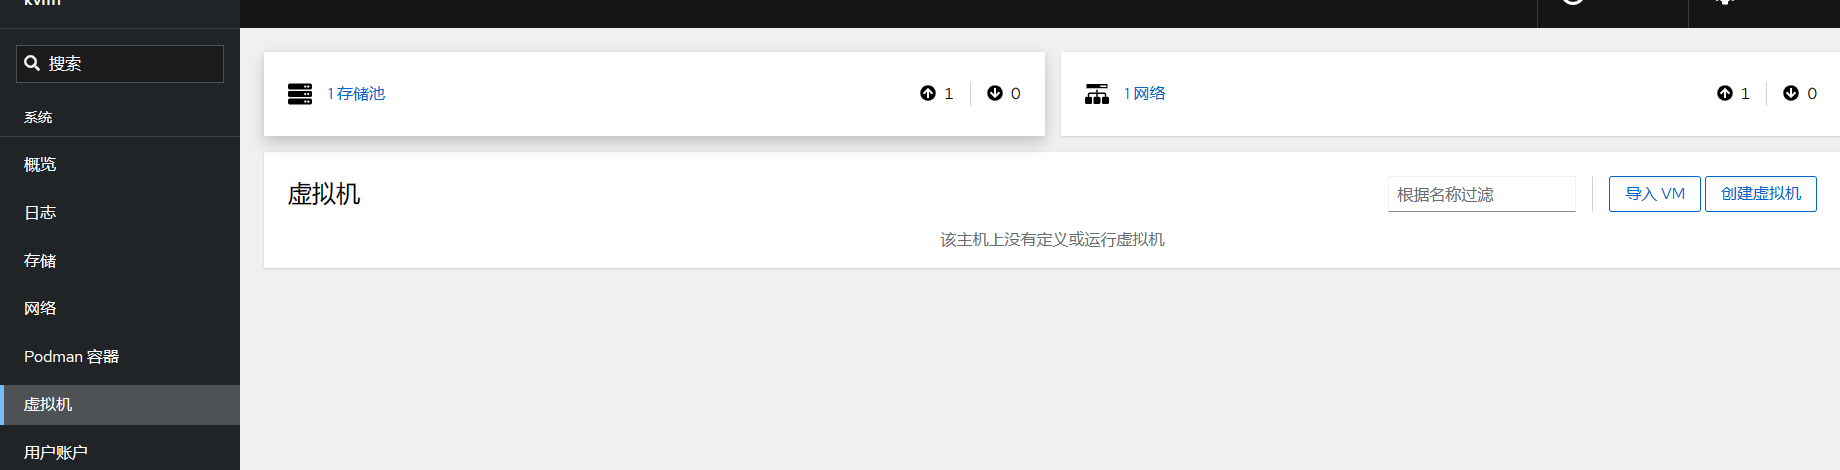
- 登录主机的cockpit页面
- 查看cockpit的虚拟机管理界面
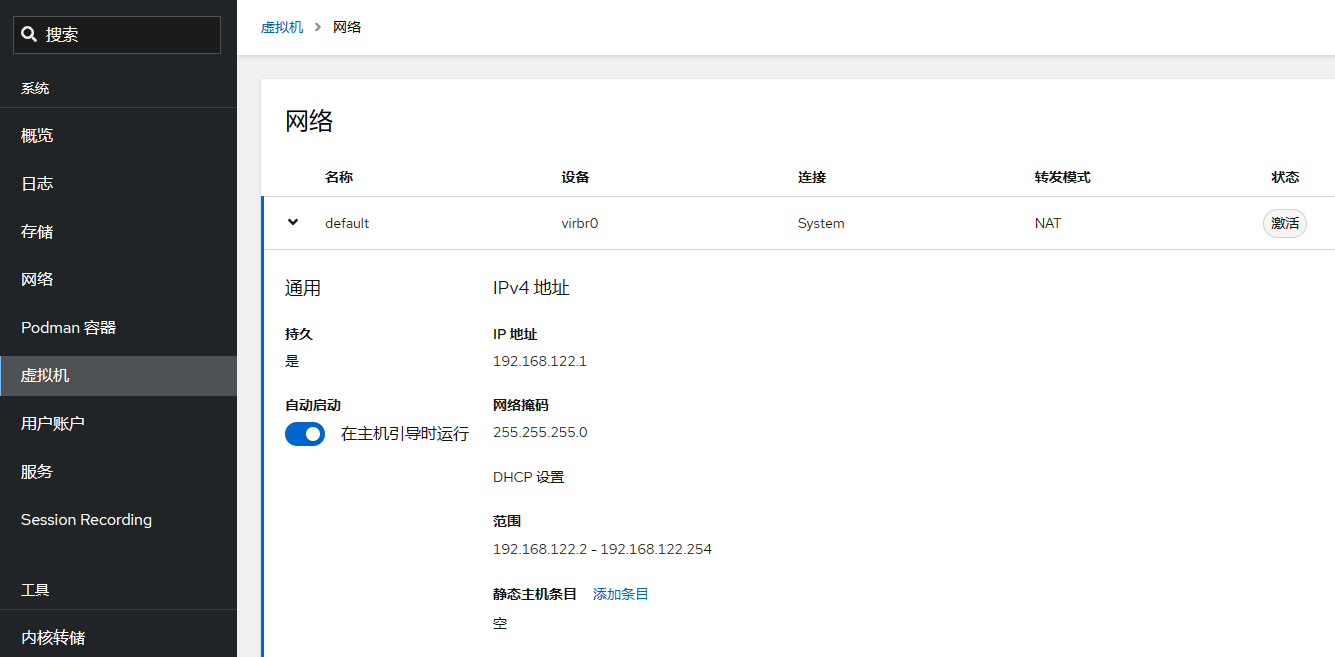
- 查看虚拟机的网络配置信息
- 创建虚机
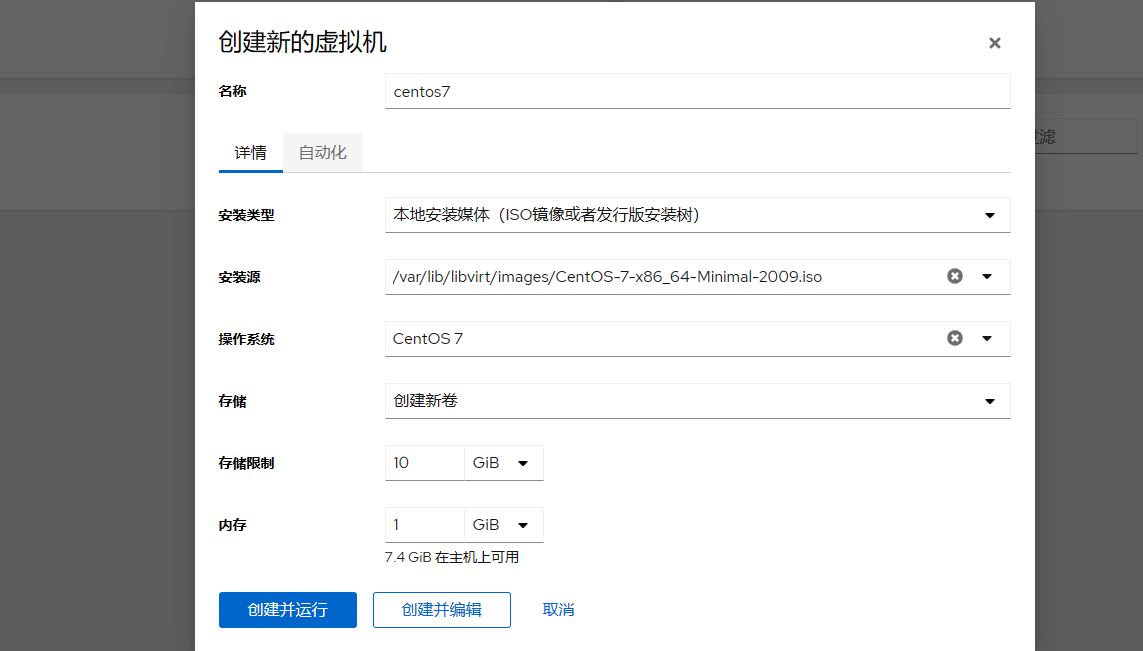
- 部署虚机
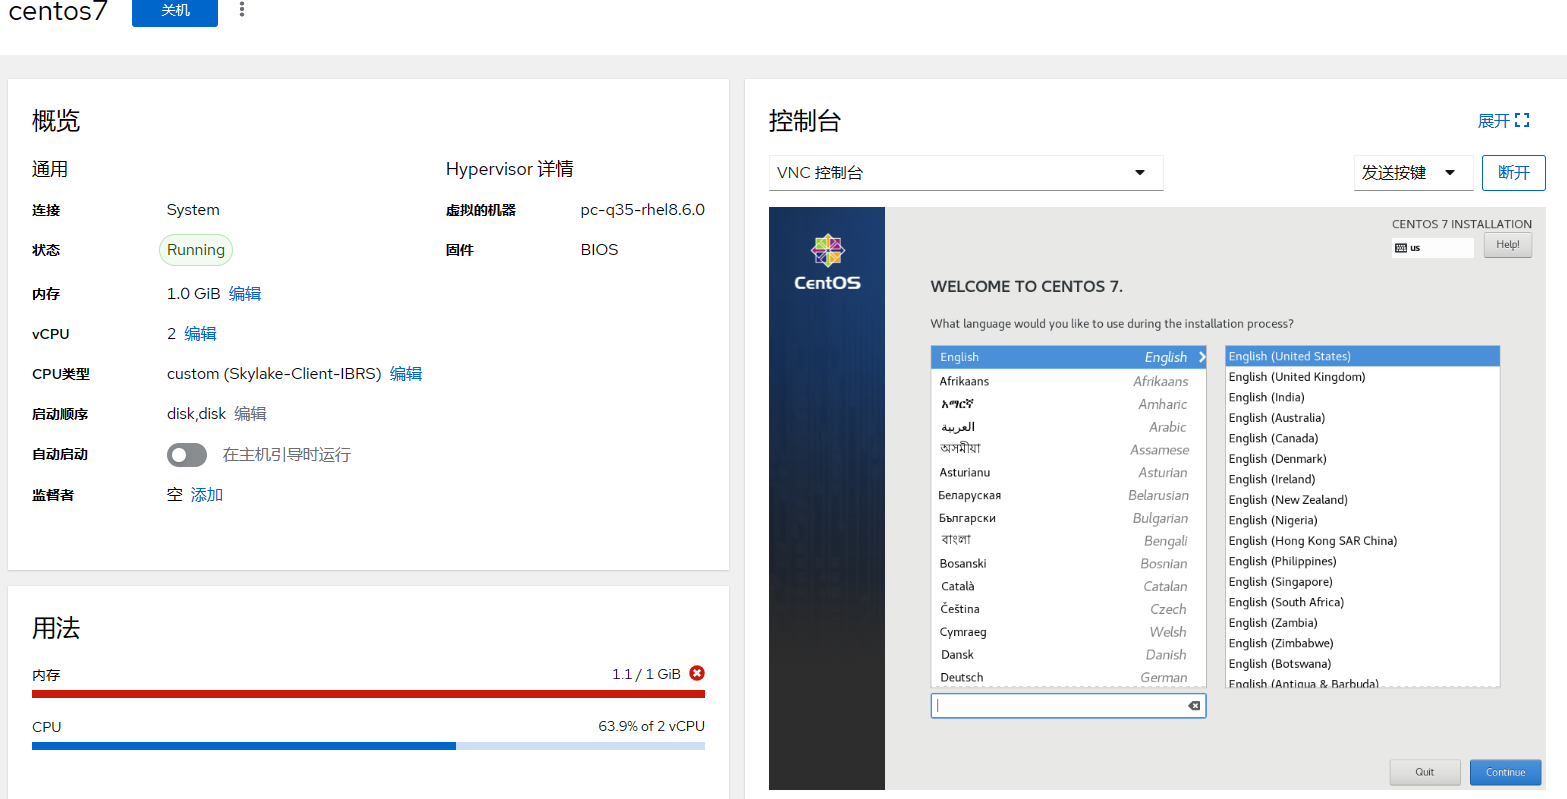
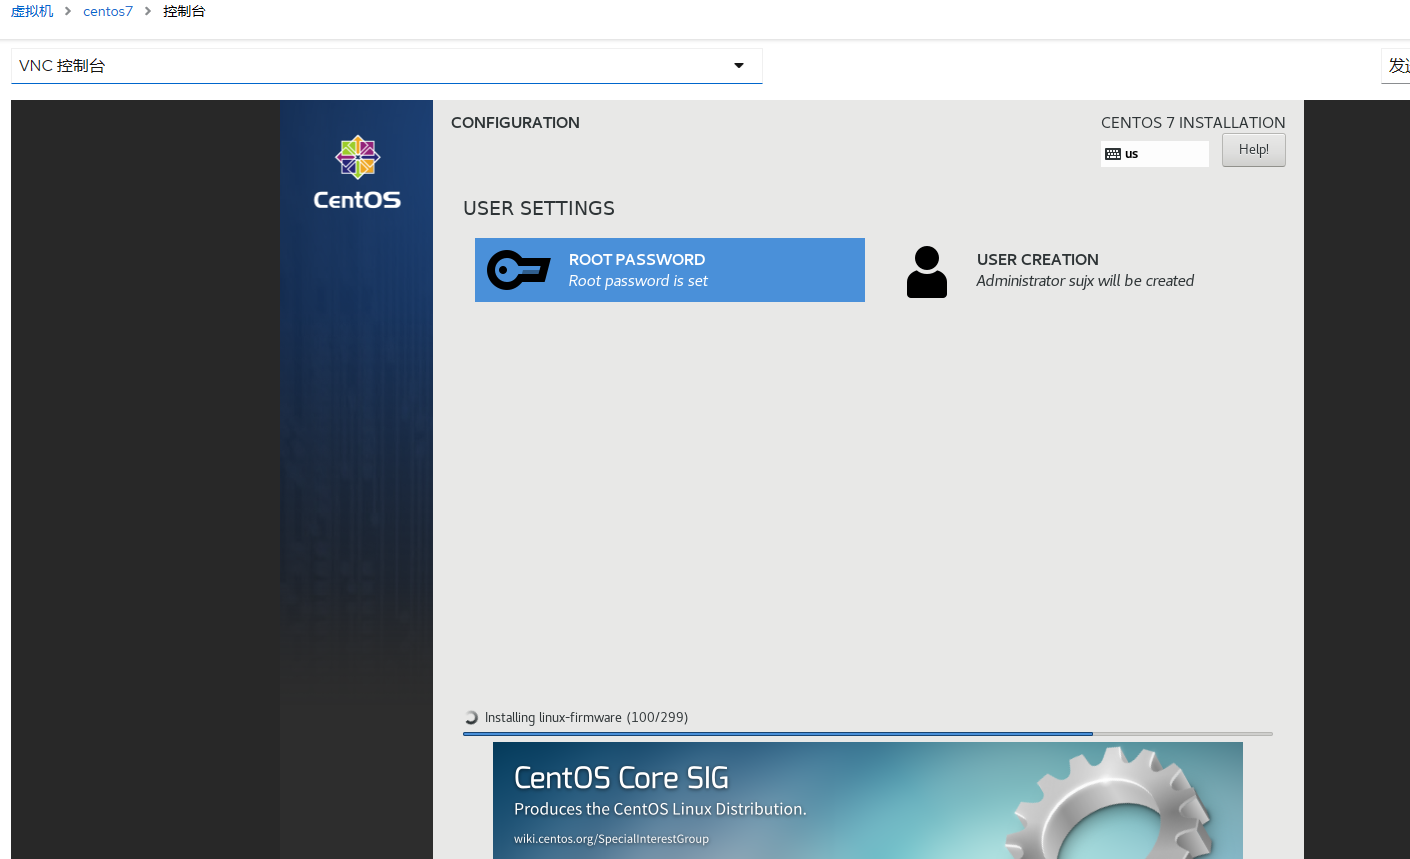
- 虚机安装
命令行部署虚机
# 查看安装帮助
[root@kvm1 ~]# virt-install --help
# 查看可用选项
[root@kvm1 ~]# virt-install --option=?
usage: virt-install --name NAME --memory MB STORAGE INSTALL [options]
virt-install: error: unrecognized arguments: --option=?
# 查看disk选项的可选值
[root@kvm1 ~]# virt-install --disk=?
# 查看os-variant支持的版本
[root@kvm1 ~]# osinfo-query os |grep centos
 centos-stream8       | CentOS Stream 8                                    | 8        | http://centos.org/centos-stream/8
 centos-stream9       | CentOS Stream 9                                    | 9        | http://centos.org/centos-stream/9
 centos7.0            | CentOS 7                                           | 7        | http://centos.org/centos/7.0
 centos8              | CentOS 8                                           | 8        | http://centos.org/centos/8
 # 执行部署
 [root@kvm1 ~]# virt-install --name centos --memory 1048 --vcpus 1 --disk size=5 --cdrom /var/lib/libvirt/images/CentOS-7-x86_64-Minimal-2009.iso --os-variant centos7.0
WARNING  Unable to connect to graphical console: virt-viewer not installed. Please install the 'virt-viewer' package.
WARNING  No console to launch for the guest, defaulting to --wait -1

Starting install...
Allocating 'centos.qcow2'                                                                                                                                                                  | 5.0 GB  00:00:00

Domain is still running. Installation may be in progress.
Waiting for the installation to complete.
# 执行自动化安装
# 首先获取先前部署的centos7的anaconda-ks.cfg文件
[root@kvm1 ~]# cat ks.cfg
#version=DEVEL
# System authorization information
auth --enableshadow --passalgo=sha512
# Use CDROM installation media
cdrom
# Use graphical install
graphical
# Run the Setup Agent on first boot
firstboot --enable
ignoredisk --only-use=vda
# Keyboard layouts
keyboard --vckeymap=us --xlayouts='us'
# System language
lang en_US.UTF-8 --addsupport=zh_CN.UTF-8

# Network information
network  --bootproto=dhcp --device=eth0 --ipv6=auto --activate
network  --hostname=guest

# Root password
rootpw --iscrypted $6$fXDkAKiYiFm45WVl$y4aKkyg3WrG/Kr9V2zmudjiteXLi8omfkIWob4QHlI2M6EflNlUDkeGL2dTsN6fPL7GiPbtSj81D2iXZmKFg6/
# System services
services --disabled="chronyd"
# System timezone
timezone Asia/Shanghai --isUtc --nontp
user --groups=wheel --name=sujx --password=$6$O53JLC0/ED1zlRAT$6uMXZclHzYezzmuy.NrK7Hx2olv1IfRp949/kNlguE8g.zDIcAqZpacF1tSnQLMOVWCoY7fKai9aWli/Qqf.Z0 --iscrypted --gecos="sujx"
# System bootloader configuration
bootloader --append=" crashkernel=auto console=ttyS0,115200"" --location=mbr --boot-drive=vda
autopart --type=lvm
# Partition clearing information
clearpart --none --initlabel
# SeLinuxConfig
seLinux --disabled

%packages
@^minimal
@core
kexec-tools
wget
telnet
sysstat
qemu-guest-agent
services --enable serial-getty@ttyS0.service,qemu-guest-agent

%end

%addon com_redhat_kdump --enable --reserve-mb='auto'

%end

%anaconda
pwpolicy root --minlen=6 --minquality=1 --notstrict --nochanges --notempty
pwpolicy user --minlen=6 --minquality=1 --notstrict --nochanges --emptyok
pwpolicy luks --minlen=6 --minquality=1 --notstrict --nochanges --notempty
%end
# 调用kickstart文件进行自动化部署,需要注意的是原来的部署源要从cdrom修改为location,并配置kernel地址。
# 如果在ks文件中不修改kernel配置,则还可以使用cdrom参数
[root@kvm1 ~]# virt-install --name centos --memory 1048 --vcpus 1 --disk size=5 --location /var/lib/libvirt/images/CentOS-7-x86_64-Minimal-2009.iso,initrd=isolinux/initrd.img,kernel=isolinux/vmlinuz --os-variant centos7.0 --initrd-inject /root/ks.cfg --extra-args ="ks=file:/ks.cfg"
管理虚机
# virsh 是管理KVM最主要的工具.
# 查看虚机清单
[root@kvm1 images]# virsh list --all
 Id   Name      State
-------------------------
 2    centos7   running
# 查看虚机信息,使用虚机ID或者Name均可
[root@kvm1 images]# virsh dominfo 2
Id:             2
Name:           centos7
UUID:           8a6e60ff-d005-4b86-943f-566ea5de2164
OS Type:        hvm
State:          running
CPU(s):         2
CPU time:       33.2s
Max memory:     1048576 KiB
Used memory:    1048576 KiB
Persistent:     yes
Autostart:      disable
Managed save:   no
Security model: none
Security DOI:   0
# 查看虚机IP地址
[root@kvm1 images]# virsh domifaddr centos7
 Name       MAC address          Protocol     Address
-------------------------------------------------------------------------------
 vnet1      52:54:00:68:0d:79    ipv4         192.168.122.242/24
# 查看虚拟磁盘信息
[root@kvm1 images]# virsh domblklist centos7
 Target   Source
-------------------------------------------------
 vda      /var/lib/libvirt/images/centos7.qcow2
 sda      -
# 查看默认存储池中的内容
[root@kvm1 images]# virsh vol-list default
 Name                               Path
----------------------------------------------------------------------------------------------
 CentOS-7-x86_64-Minimal-2009.iso   /var/lib/libvirt/images/CentOS-7-x86_64-Minimal-2009.iso
 centos7.qcow2                      /var/lib/libvirt/images/centos7.qcow2
# 查看系统的存储池
[root@kvm1 images]# virsh pool-list
 Name      State    Autostart
-------------------------------
 default   active   yes
 KVM       active   yes
# 创建虚机之后的网卡变化,多出来一个类型为tun的vnet1
[root@kvm1 images]# nmcli c show
NAME    UUID                                  TYPE      DEVICE
ens160  b2aeba94-95b0-4944-ac7b-c20e3fc15bd0  ethernet  ens160
virbr0  87574d83-cd4d-4579-b6e7-2c14827af7a0  bridge    virbr0
vnet1   87aa11ea-4e07-4d29-bc9b-83a981ae2f79  tun       vnet1
# 安装QemuGuestAgent
# QemuGuestAgent是KVM-QEMU平台上类似VMTools的工具,基于虚拟的串口控制器与主机进行通信
[root@guest ~]# yum install -y qemu-guest-agent
[root@guest ~]# systemctl enable --now qemu-guest-agent
# 安装完成上述插件后,就可以有更多的控制选项
# 查看虚机挂载情况
[root@kvm1 ~]# virsh domfsinfo centos7
 Mountpoint   Name   Type   Target
------------------------------------
 /            dm-0   xfs    vda
 /boot        vda1   xfs    vda
# 使用virsh console来登录虚机
[root@kvm1 ~]# virsh console 2
# 默认安装虚机会出现卡住的情况
# 需要进入虚机中,编辑 /etc/default/grub 文件,找到下面行:
GRUB_CMDLINE_LINUX="crashkernel=auto rd.lvm.lv=cl/root rd.lvm.lv=cl/swap rhgb quiet”
改为:(尾部增加 console=ttyS0,115200)
GRUB_CMDLINE_LINUX="crashkernel=auto rd.lvm.lv=centos/root rd.lvm.lv=centos/swap console=ttyS0,115200"
# 重新生成GRUB配置并更新内核参数
grub2-mkconfig -o /boot/grub2/grub.cfg
# 使用以下命令激活服务
systemctl enable --now serial-getty@ttyS0.service

# 关闭虚机
[root@kvm1 ~]# virsh shutdown centos7
Domain 'centos7' is being shutdown
# 指定--mode配置关机模式,有acpi\agent\initctl\signal\paravirt多个选项,建议在安装和启动qemu-guest-agent服务后搭配agent参数使用
[root@kvm1 ~]# virsh shutdown centos7 --mode agent
Domain 'centos7' is being shutdown
# 启动虚机
[root@kvm1 ~]# virsh start centos7
Domain 'centos7' started
# 虚机拔电
[root@kvm1 ~]# virsh destroy centos7
Domain 'centos7' destroyed
# 挂起(暂停)和恢复虚拟机
[root@kvm1 ~]# virsh suspend centos7
Domain 'centos7' suspended
[root@kvm1 ~]# virsh resume centos7
Domain 'centos7' resumed
# 保存虚机状态并关闭源虚机
[root@kvm1 ~]# virsh save centos7 centos7.9.2009
Domain 'centos7' saved to centos7.9.2009
[root@kvm1 ~]# virsh list --all
 Id   Name      State
--------------------------
 3    centos    running
 -    centos7   shut off
# 恢复保存点的状态
[root@kvm1 ~]# virsh restore centos7.9.2009
Domain restored from centos7.9.2009
[root@kvm1 ~]# virsh list --all
 Id   Name      State
-------------------------
 3    centos    running
 7    centos7   running
# Host上虚机的配置文件位置
[root@kvm1 qemu]# pwd
/etc/libvirt/qemu
# 基于配置文件创建新的虚机
[root@kvm1 qemu]# virsh dumpxml centos7 > centos792009.xml
[root@kvm1 qemu]# ls
centos792009.xml  centos7.xml  centos.xml  networks
[root@kvm1 qemu]# virsh domblklist centos7
 Target   Source
-------------------------------------------------
 vda      /var/lib/libvirt/images/centos7.qcow2
 sda      -
# 创建新的虚机文件
[root@kvm1 qemu]# cp /var/lib/libvirt/images/centos7.qcow2 /var/lib/libvirt/images/centos792009.qcow2
# 删除原有UUID,并修改磁盘文件位置和配置文件名称
[root@kvm1 qemu]# vim centos792009.xml
# 依据配置文件创建主机
[root@kvm1 qemu]# virsh create centos792009.xml
Domain 'centos792009' created from centos792009.xml
# 使用create命令创建的虚机只执行一次,关机即undefine.
[root@kvm1 qemu]# virsh shutdown centos792009
Domain 'centos792009' is being shutdown
[root@kvm1 qemu]# virsh list --all
 Id   Name      State
-------------------------
 3    centos    running
 7    centos7   running
# 使用define命令可以创建被定义的主机,即关机仍保留可管理状态
[root@kvm1 qemu]# virsh define centos792009.xml
Domain 'centos792009' defined from centos792009.xml
[root@kvm1 qemu]# virsh list --all
 Id   Name           State
-------------------------------
 3    centos         running
 7    centos7        running
 -    centos792009   shut off
[root@kvm1 qemu]# virsh start centos792009
Domain 'centos792009' started
[root@kvm1 qemu]# virsh shutdown centos792009
Domain 'centos792009' is being shutdown

[root@kvm1 qemu]# virsh list --all
 Id   Name           State
-------------------------------
 3    centos         running
 7    centos7        running
 -    centos792009   shut off
# 删除虚机
[root@kvm1 qemu]# virsh undefine centos --remove-all-storage
Domain 'centos' has been undefined
Volume 'vda'(/var/lib/libvirt/images/centos.qcow2) removed.

# 管理快照
[root@kvm1 images]# virsh snapshot-list centos7
 Name   Creation Time   State
-------------------------------
# 创建快照
[root@kvm1 images]# virsh snapshot-create centos7
Domain snapshot 1684926926 created
[root@kvm1 images]# virsh snapshot-list centos7
 Name         Creation Time               State
---------------------------------------------------
 1684926926   2023-05-24 19:15:26 +0800   shutoff
# 应用快照
[root@kvm1 images]# virsh snapshot-revert centos7 --snapshotname 1684926926
# 删除快照
[root@kvm1 images]# virsh snapshot-delete centos7 --snapshotname 1684926926
Domain snapshot 1684926926 deleted

[root@kvm1 images]# virsh snapshot-list centos7
 Name   Creation Time   State
-------------------------------


### 管理存储

#### 存储模式
    - 基于文件系统的存储
    - 基于块设备的存储
#### 磁盘类型
    - 固定Fixe
    - 动态Dynamic
    - 差异Differencing

#### 支持的虚拟镜像格式
    - RAW
    - QCOW2
    - VMDK
    - VHD\VHDX
    - VDI
#### QEMU-img

#### 概述

qemu-img是一个功能强大的磁盘镜像管理工具

```shell
# 获取帮助
[root@kvm1 ~]# qemu-img --help
check #检查完整性
create #创建镜像
commit #提交更改
compare #比较
convert #转换
info #获得信息
map #映射
snapshot #快照管理
rebase #在已有的镜像的基础上创建新的镜像
resize #调整大小
amend #修订镜像格式选项
创建磁盘文件
# 基本使用格式
qemu-img create [-q] [--object objectdef] [-f fmt] [-b backing_file] [-F
backing_fmt] [-u] [-o options] filename [size]
# 创建默认的稀疏格式的磁盘
[root@kvm1 images]# qemu-img create vm1.img 1g
Formatting 'vm1.img', fmt=raw size=1073741824
[root@kvm1 images]# ll -alh
total 6.7G
drwx--x--x 2 root root  108 May 24 18:10 .
drwxr-xr-x 9 root root  106 May 23 18:26 ..
-rw-r--r-- 1 root root 1.0G May 24 18:10 vm1.img
[root@kvm1 images]# du -h vm1.img
1.0M	vm1.img
[root@kvm1 images]# qemu-img info vm1.img
image: vm1.img
file format: raw
virtual size: 1 GiB (1073741824 bytes)
disk size: 1 MiB
检查磁盘
# 需要在虚机关机状态下进行
[root@kvm1 images]# qemu-img check ./centos792009.qcow2
No errors were found on the image.
163840/163840 = 100.00% allocated, 0.00% fragmented, 0.00% compressed clusters
Image end offset: 10739318784
磁盘预分配策略
预分配策略:
- off 此为默认政策,即不使用预分配,磁盘占用空间小
- metadata 只预分配元数据,属于稀疏映像类型,相当于精简置备磁盘
- falloc 分配文件块并标识为未初始化,即只分配空间但不置零,属于非稀疏映像,相当于厚置备延迟置零
- full 分配所有磁盘空间并置零,属于非稀疏映像,相当于厚置备置零。
# 创建映像文件
[root@kvm1 images]# qemu-img create -f qcow2 vm2.qcow2 1g -o preallocation=off
Formatting 'vm2.qcow2', fmt=qcow2 cluster_size=65536 extended_l2=off preallocation=off compression_type=zlib size=1073741824 lazy_refcounts=off refcount_bits=16
# 查看文件属性
[root@kvm1 images]# qemu-img info vm2.qcow2
image: vm2.qcow2
file format: qcow2
virtual size: 1 GiB (1073741824 bytes)
disk size: 196 KiB
cluster_size: 65536
Format specific information:
    compat: 1.1
    compression type: zlib
    lazy refcounts: false
    refcount bits: 16
    corrupt: false
    extended l2: false
# 只分配元数据
[root@kvm1 images]# qemu-img create -f qcow2 vm3.qcow2 1g -o preallocation=metadata
Formatting 'vm3.qcow2', fmt=qcow2 cluster_size=65536 extended_l2=off preallocation=metadata compression_type=zlib size=1073741824 lazy_refcounts=off refcount_bits=16
# 可见比默认文件要大
[root@kvm1 images]# qemu-img info vm3.qcow2
image: vm3.qcow2
file format: qcow2
virtual size: 1 GiB (1073741824 bytes)
disk size: 2 MiB
cluster_size: 65536
Format specific information:
    compat: 1.1
    compression type: zlib
    lazy refcounts: false
    refcount bits: 16
    corrupt: false
    extended l2: false
磁盘格式转换
# 默认转换为raw格式
[root@kvm1 ~]# qemu-img convert CentOS8.2.vmdk CentOS8.2.img
# 转化为qcow2格式
[root@kvm1 ~]# qemu-img convert -f vmdk -O qcow2 CentOS8.2.vmdk CentOS8.2.qcow2
调整磁盘大小
- 操作之前,一定要做好数据备份
- 增加文件大小后,需要在客户机中使用fdisk、parted等分区工具进行相应的操作才能真正让客户机使用到增加后的镜像空间。
- 缩小镜像之前,要在客户机中保证里面的文件系统有空余空间,否则会数据丢失。另外xfs文件系统不支持缩减
- qcow2不支持缩小镜像的操作
# 操作之前的磁盘
[root@kvm1 images]# qemu-img info vm1.img
image: vm1.img
file format: raw
virtual size: 1 GiB (1073741824 bytes)
disk size: 1 MiB
# 文件扩容1GB
[root@kvm1 images]# qemu-img resize ./vm1.img +512M
WARNING: Image format was not specified for './vm1.img' and probing guessed raw.
         Automatically detecting the format is dangerous for raw images, write operations on block 0 will be restricted.
         Specify the 'raw' format explicitly to remove the restrictions.
Image resized.
# 操作完成
[root@kvm1 images]# qemu-img info vm1.img
image: vm1.img
file format: raw
virtual size: 1.5 GiB (1610612736 bytes)
disk size: 1 MiB
# 缩容1GB
[root@kvm1 images]# qemu-img resize --shrink ./vm1.img -1G
WARNING: Image format was not specified for './vm1.img' and probing guessed raw.
         Automatically detecting the format is dangerous for raw images, write operations on block 0 will be restricted.
         Specify the 'raw' format explicitly to remove the restrictions.
Image resized.
# 缩容结果
[root@kvm1 images]# qemu-img info vm1.img
image: vm1.img
file format: raw
virtual size: 512 MiB (536870912 bytes)
disk size: 1 MiB
快照管理
磁盘快照的分类:
- 按照快照信息分为:
- 内置快照:快照数据和Base数据放在同一个qcow2文件中;
- 外置快照:快照数据单独一个qcow2文件存放;
- 按照虚机运行状态可以分为:
- 关机态快照:数据可以保持一致性
- 运行态快照:数据无法保证一致性,可能需要fsck操作
- 按照磁盘数量可以分为:
- 单盘:不涉及原子性
- 多盘:涉及原子性,要么所有盘快照都成功,要么全失败
# 查看虚机磁盘信息
[root@kvm1 images]# virsh domblklist centos7
 Target   Source
-------------------------------------------------
 vda      /var/lib/libvirt/images/centos7.qcow2
 sda      -
# 查看当前磁盘快照信息
[root@kvm1 images]# qemu-img snapshot -l centos7.qcow2
# 创建名为centos7-1的快照
[root@kvm1 images]# qemu-img snapshot -c centos7-1 ./centos7.qcow2
# 再次查看磁盘快照信息
[root@kvm1 images]# qemu-img snapshot -l centos7.qcow2
Snapshot list:
ID        TAG               VM SIZE                DATE     VM CLOCK     ICOUNT
1         centos7-1             0 B 2023-05-24 19:06:20 00:00:00.000          0
# 磁盘属性中也有快照信息
[root@kvm1 images]# qemu-img info ./centos7.qcow2
image: ./centos7.qcow2
file format: qcow2
virtual size: 10 GiB (10737418240 bytes)
disk size: 2.34 GiB
cluster_size: 65536
Snapshot list:
ID        TAG               VM SIZE                DATE     VM CLOCK     ICOUNT
1         centos7-1             0 B 2023-05-24 19:06:20 00:00:00.000          0
Format specific information:
    compat: 1.1
    compression type: zlib
    lazy refcounts: true
    refcount bits: 16
    corrupt: false
    extended l2: false
# 删除文件并通过磁盘快照找回
[root@kvm1 images]# virsh start centos7
Domain 'centos7' started
[root@kvm1 images]# virsh console centos7
Connected to domain 'centos7'
Escape character is ^] (Ctrl + ])

guest login: root
Password:
Last login: Wed May 24 11:19:56 on ttyS0
[root@guest ~]# ls
anaconda-ks.cfg
[root@guest ~]# rm anaconda-ks.cfg
rm: remove regular file ‘anaconda-ks.cfg’? y
[root@guest ~]# poweroff

[root@kvm1 images]# qemu-img snapshot -a centos7-1 ./centos7.qcow2
[root@kvm1 images]# virsh start centos7
Domain 'centos7' started
[root@kvm1 images]# virsh console centos7
Connected to domain 'centos7'
Escape character is ^] (Ctrl + ])

guest login: root
Password:
Last login: Wed May 24 11:19:56 on ttyS0
[root@guest ~]# ls
anaconda-ks.cfg
# 删除磁盘快照
[root@kvm1 images]# qemu-img snapshot -d centos7-1 ./centos7.qcow2
[root@kvm1 images]# qemu-img snapshot -l ./centos7.qcow2
管理网络
查看默认网络环境
libvirt网络的最重要组件是虚拟网络交换机,默认由Linux网桥实现,libvirt会创建virbr0,虚拟交换机的端口数量没有限制。连接网桥的接口通常被称为slave接口。
在libvirtd守护程序启动时,会根据配置文件创建一个default的虚拟网络,并通过配置IP转发、iptables的NAT表从而实现NAT功能。libvirt使用IP伪装(IP Masquerading)实现内部虚机访问外部。
# ipv4的转发功能已打开
[root@kvm1 images]# cat /proc/sys/net/ipv4/ip_forward
1
# 查看当前路由表
[root@kvm1 images]# iptables -t nat -L -n
Chain PREROUTING (policy ACCEPT)
target     prot opt source               destination

Chain INPUT (policy ACCEPT)
target     prot opt source               destination

Chain POSTROUTING (policy ACCEPT)
target     prot opt source               destination
LIBVIRT_PRT  all  --  0.0.0.0/0            0.0.0.0/0

Chain OUTPUT (policy ACCEPT)
target     prot opt source               destination

Chain LIBVIRT_PRT (1 references)
target     prot opt source               destination
RETURN     all  --  192.168.122.0/24     224.0.0.0/24
RETURN     all  --  192.168.122.0/24     255.255.255.255
MASQUERADE  tcp  --  192.168.122.0/24    !192.168.122.0/24     masq ports: 1024-65535
MASQUERADE  udp  --  192.168.122.0/24    !192.168.122.0/24     masq ports: 1024-65535
MASQUERADE  all  --  192.168.122.0/24    !192.168.122.0/24
# 由dnsmasq提供dhcp,默认地址池为192.168.122.2~254
[root@kvm1 images]# ps aux|grep dnsmq
root       12962  0.0  0.0  12144  1164 pts/0    S+   19:50   0:00 grep --color=auto dnsmq
[root@kvm1 images]# cat /var/lib/libvirt/dnsmasq/default.conf
##WARNING:  THIS IS AN AUTO-GENERATED FILE. CHANGES TO IT ARE LIKELY TO BE
##OVERWRITTEN AND LOST.  Changes to this configuration should be made using:
##    virsh net-edit default
## or other application using the libvirt API.
##
## dnsmasq conf file created by libvirt
strict-order
pid-file=/run/libvirt/network/default.pid
except-interface=lo
bind-dynamic
interface=virbr0
dhcp-range=192.168.122.2,192.168.122.254,255.255.255.0
dhcp-no-override
dhcp-authoritative
dhcp-lease-max=253
dhcp-hostsfile=/var/lib/libvirt/dnsmasq/default.hostsfile
addn-hosts=/var/lib/libvirt/dnsmasq/default.addnhosts

# 查看虚机网络配置
# 开机之前
[root@kvm1 images]# nmcli c
NAME    UUID                                  TYPE      DEVICE
ens160  b2aeba94-95b0-4944-ac7b-c20e3fc15bd0  ethernet  ens160
virbr0  0782ace4-e598-4332-95a8-b91556cb1523  bridge    virbr0
[root@kvm1 images]# virsh domiflist centos7
 Interface   Type      Source    Model    MAC
-------------------------------------------------------------
 -           network   default   virtio   52:54:00:68:0d:79
# 开机之后
[root@kvm1 images]# virsh start centos7
Domain 'centos7' started
[root@kvm1 images]# nmcli c
NAME    UUID                                  TYPE      DEVICE
ens160  b2aeba94-95b0-4944-ac7b-c20e3fc15bd0  ethernet  ens160
virbr0  0782ace4-e598-4332-95a8-b91556cb1523  bridge    virbr0
vnet3   cfa6cdb4-9f5d-430f-a088-fc9e717f18b1  tun       vnet3
[root@kvm1 images]# virsh domiflist centos7
 Interface   Type      Source    Model    MAC
-------------------------------------------------------------
 vnet2       network   default   virtio   52:54:00:68:0d:79
 # 新虚机设备的网络接口的名称时以vnet为开头,从0开始,并从dnsmasq获取IP地址
设备类型工作原理和管理
虚拟网络接口设备功能与物理网卡类似,有两种常用类型:TAP、TUN。TUN、TAP是没有关联物理设备的虚拟接口,用户空间程序可以附加到TUN/TAP接口并处理发送到该接口的流量。可以为该接口分配IP地址、路由数据包到该接口、分析流量等。应用场景为VPN和云计算。
TUN设备在OSI3层运行,实现虚拟IP点对点接口,没有Mac地址,不能称为网桥的slave设备。
TAP设备运行在OSI模型的2层,可以接受和发送原始以太网数据包,有Mac地址,可以成为网桥的slave设备。
# 创建tap设备
[root@kvm1 images]# ip tuntap add dev tap-nic1 mode tap
[root@kvm1 images]# ip link
1: lo: <LOOPBACK,UP,LOWER_UP> mtu 65536 qdisc noqueue state UNKNOWN mode DEFAULT group default qlen 1000
    link/loopback 00:00:00:00:00:00 brd 00:00:00:00:00:00
2: ens160: <BROADCAST,MULTICAST,UP,LOWER_UP> mtu 1500 qdisc mq state UP mode DEFAULT group default qlen 1000
    link/ether 00:0c:29:a9:29:c5 brd ff:ff:ff:ff:ff:ff
    altname enp3s0
3: virbr0: <BROADCAST,MULTICAST,UP,LOWER_UP> mtu 1500 qdisc noqueue state UP mode DEFAULT group default qlen 1000
    link/ether 52:54:00:16:e8:45 brd ff:ff:ff:ff:ff:ff
7: vnet3: <BROADCAST,MULTICAST,UP,LOWER_UP> mtu 1500 qdisc noqueue master virbr0 state UNKNOWN mode DEFAULT group default qlen 1000
    link/ether fe:54:00:68:0d:79 brd ff:ff:ff:ff:ff:ff
8: tap-nic1: <BROADCAST,MULTICAST> mtu 1500 qdisc noop state DOWN mode DEFAULT group default qlen 1000
    link/ether ce:b1:d6:f5:b2:be brd ff:ff:ff:ff:ff:ff
# 删除tap设备
[root@kvm1 images]# ip tuntap del dev tap-nic1 mode tap
# 使用NetworkManager来新增一个tun设备
[root@kvm1 images]# nmcli c add type tun con-name newcon1 ifname tap-nic2 mode tap ip4 172.16.123.2/24
Connection 'newcon1' (7b45dbc7-ffe2-4375-9377-9cb94238ac42) successfully added.
[root@kvm1 images]# nmcli c
NAME     UUID                                  TYPE      DEVICE
ens160   b2aeba94-95b0-4944-ac7b-c20e3fc15bd0  ethernet  ens160
newcon1  7b45dbc7-ffe2-4375-9377-9cb94238ac42  tun       tap-nic2
virbr0   0782ace4-e598-4332-95a8-b91556cb1523  bridge    virbr0
vnet3    cfa6cdb4-9f5d-430f-a088-fc9e717f18b1  tun       vnet3
[root@kvm1 images]# ip tuntap list
vnet3: tap vnet_hdr
tap-nic2: tap persist
KVM/libvirt常用网络类型
- NAT模式
- 桥接模式
- 隔离模式
- 路由模式
- 开封模式
- 直接附加模式
- PCI直通与SR-IOV
管理存储
虚拟存储时可以分配给虚机的存储空军,是宿主机物理存储的一部分,是通过模拟或者半虚拟化的快设备驱动程序分配给虚机的存储。由Libvirt创建和管理的存储称为托管存储(Managed Storage),管理员手工创建的则被称为非托管存储。
术语
- 虚拟机设备
# type 设备类型
file block dir network volume nvme,默认为file
# device 设备
floppy cdrom disk lun,默认为disk
# source 源地址
# bus 指定要模拟的设备类型,或者指驱动程序
ide scsi virtio usb sata sd- 宿主机设备
# 映像文件
# LVM卷
# 宿主设备
# 分布式存储系统
存储池
概念
存储池是由Libvirt管理的为虚机预留的宿主机上的存储容量,可以在存储池的空间中创建存储卷,然后将存储卷当作块设备分配给虚机。存储池屏蔽了底层物理路径,提高的系统管理的灵活性。
# 查看宿主机存储池情况
[root@kvm1 ~]# virsh pool-list --all --details
 Name      State     Autostart   Persistent   Capacity    Allocation   Available
----------------------------------------------------------------------------------
 default   running   yes         yes          16.40 GiB   7.01 GiB     9.39 GiB
 ISO       running   yes         yes          9.99 GiB    1.05 GiB     8.93 GiB
 KVM       running   yes         yes          9.99 GiB    1.05 GiB     8.93 GiB
 NFS       running   yes         yes          49.97 GiB   3.25 GiB     46.72 GiB
# 查看指定存储池详细信息
[root@kvm1 ~]# virsh pool-info NFS
Name:           NFS
UUID:           a761ebee-3a45-484b-9464-e80e79b078b3
State:          running
Persistent:     yes
Autostart:      yes
Capacity:       49.97 GiB
Allocation:     3.25 GiB
Available:      46.72 GiB
# 查看执行存储池XML配置
[root@kvm1 ~]# virsh pool-dumpxml ISO
<pool type='dir'>
  <name>ISO</name>
  <uuid>7c0205b7-a6f7-4381-a509-bb5bd2d5a770</uuid>
  <capacity unit='bytes'>10722738176</capacity>
  <allocation unit='bytes'>1128935424</allocation>
  <available unit='bytes'>9593802752</available>
  <source>
  </source>
  <target>
    <path>/data/iso</path>
    <permissions>
      <mode>0755</mode>
      <owner>0</owner>
      <group>0</group>
    </permissions>
  </target>
</pool>
# 存储池配置文件
[root@kvm1 ~]# tree /etc/libvirt/storage/
/etc/libvirt/storage/
├── autostart
│   ├── default.xml -> /etc/libvirt/storage/default.xml
│   ├── ISO.xml -> /etc/libvirt/storage/ISO.xml
│   ├── KVM.xml -> /etc/libvirt/storage/KVM.xml
│   └── NFS.xml -> /etc/libvirt/storage/NFS.xml
├── default.xml
├── ISO.xml
├── KVM.xml
└── NFS.xml

1 directory, 8 files
创建
存储池按照时效性划分可以有持久型存储池和临时性存储池;按底层存储技术可以分为基于目录、基于磁盘、基于分区、基于GlusterFS、基于iSCSI、基于LVM、基于ZFS等多种存储池;按照存储位置可以分为本地存储池和共享存储池。
[root@kvm1 ~]# virsh pool-create-as --
--adapter-name               --adapter-parent-wwpn        --auth-username              --overwrite                  --source-dev                 --source-name                --type
--adapter-parent             --adapter-wwnn               --build                      --print-xml                  --source-format              --source-path
--adapter-parent-fabric-wwn  --adapter-wwpn               --name                       --secret-usage               --source-host                --source-protocol-ver
--adapter-parent-wwnn        --auth-type                  --no-overwrite               --secret-uuid                --source-initiator           --target
[root@kvm1 ~]# virsh pool-create-as --type
dir           disk          fs            gluster       iscsi         iscsi-direct  logical       mpath         netfs         rbd           scsi          sheepdog      vstorage      zfs
存储池创建的流程:
- 定义(define)存储池
- 构建(build)存储池目标路径
- 启动(start)存储池
- 将存储池设置为自动启动(autostrat)
# 创建基于目录的存储池
[root@kvm1 ~]# virsh pool-define-as --name test --type dir --target "/data/test"
Pool test defined
# 查看配置文件信息
[root@kvm1 ~]# cat /etc/libvirt/storage/test.xml
<!--
WARNING: THIS IS AN AUTO-GENERATED FILE. CHANGES TO IT ARE LIKELY TO BE
OVERWRITTEN AND LOST. Changes to this xml configuration should be made using:
  virsh pool-edit test
or other application using the libvirt API.
-->

<pool type='dir'>
  <name>test</name>
  <uuid>056536d5-b816-4b49-b822-a3b65a6c917a</uuid>
  <capacity unit='bytes'>0</capacity>
  <allocation unit='bytes'>0</allocation>
  <available unit='bytes'>0</available>
  <source>
  </source>
  <target>
    <path>/data/test</path>
  </target>
</pool>
# 当前并不会创建池
[root@kvm1 ~]# virsh pool-list
 Name      State    Autostart
-------------------------------
 default   active   yes
 ISO       active   yes
 KVM       active   yes
 NFS       active   yes
# 构建存储池
[root@kvm1 ~]# virsh pool-build test
Pool test built
# 依然没有存储池,build命令会自动创建文件目录
[root@kvm1 ~]# virsh pool-list
 Name      State    Autostart
-------------------------------
 default   active   yes
 ISO       active   yes
 KVM       active   yes
 NFS       active   yes
# 启动存储池
[root@kvm1 ~]# virsh pool-start test
Pool test started
# 可见存储池已经可用,但是临时性的
[root@kvm1 ~]# virsh pool-list
 Name      State    Autostart
-------------------------------
 default   active   yes
 ISO       active   yes
 KVM       active   yes
 NFS       active   yes
 test      active   no
# 配置自动启动
[root@kvm1 ~]# virsh pool-autostart test
Pool test marked as autostarted

[root@kvm1 ~]# virsh pool-list
 Name      State    Autostart
-------------------------------
 default   active   yes
 ISO       active   yes
 KVM       active   yes
 NFS       active   yes
 test      active   yes
# 删除存储池test
[root@kvm1 ~]# virsh pool-destroy test
# 列表中删除test存储池
[root@kvm1 ~]# virsh pool-list
 Name      State    Autostart
-------------------------------
 default   active   yes
 ISO       active   yes
 KVM       active   yes
 NFS       active   yes
# test配置文件保留
[root@kvm1 ~]# cat /etc/libvirt/storage/test.xml
<!--
WARNING: THIS IS AN AUTO-GENERATED FILE. CHANGES TO IT ARE LIKELY TO BE
OVERWRITTEN AND LOST. Changes to this xml configuration should be made using:
  virsh pool-edit test
or other application using the libvirt API.
-->

<pool type='dir'>
  <name>test</name>
  <uuid>056536d5-b816-4b49-b822-a3b65a6c917a</uuid>
  <capacity unit='bytes'>0</capacity>
  <allocation unit='bytes'>0</allocation>
  <available unit='bytes'>0</available>
  <source>
  </source>
  <target>
    <path>/data/test</path>
  </target>
</pool>
# 删除配置
[root@kvm1 ~]# virsh pool-undefine test
Pool test has been undefined
[root@kvm1 ~]# cat /etc/libvirt/storage/
autostart/   default.xml  ISO.xml      KVM.xml      NFS.xml
# 创建NFS共享为存储池
[root@kvm1 ~]# virsh pool-create-as NFS netfs --source-host=stor1 --source-path=/data/nfs --target=/data/nfs
存储卷
可以将存储池划分为存储卷,它可以使映像文件、物理分区、LVM卷或者其他可以被libvirt管理的存储。无论底层硬件架构如何,存储卷都将以块设备附加到虚机。
# 查看存储池的卷
[root@kvm1 ~]# virsh vol-list NFS
 Name                Path
--------------------------------------------------
 centosshare.qcow2   /data/nfs/centosshare.qcow2
[root@kvm1 ~]# virsh vol-list ISO --details
 Name                               Path                                         Type   Capacity     Allocation
-----------------------------------------------------------------------------------------------------------------
 CentOS-7-x86_64-Minimal-2009.iso   /data/iso/CentOS-7-x86_64-Minimal-2009.iso   file   973.00 MiB   973.00 MiB
 # 相关参数
[root@kvm1 ~]# virsh vol-
vol-clone        vol-create-as    vol-delete       vol-dumpxml      vol-key          vol-name         vol-pool         vol-upload
vol-create       vol-create-from  vol-download     vol-info         vol-list         vol-path         vol-resize       vol-wipe
# 创建一个10GB大小的预先分配元数据的存储卷
[root@kvm1 ~]# virsh vol-create-as --pool NFS --name rocky.qcow2 --format qcow2 --capacity 10G --prealloc-metadata
Vol rocky.qcow2 created
[root@kvm1 ~]# virsh vol-list --pool NFS --details
 Name                Path                          Type   Capacity    Allocation
----------------------------------------------------------------------------------
 centosshare.qcow2   /data/nfs/centosshare.qcow2   file   10.00 GiB   2.87 GiB
 rocky.qcow2         /data/nfs/rocky.qcow2         file   10.00 GiB   12.00 GiB
# 创建一个默认不提前分配磁盘的存储卷
[root@kvm1 ~]# virsh vol-create-as --pool NFS --name rocky9.qcow2 --format qcow2 --capacity 10G
Vol rocky9.qcow2 created

[root@kvm1 ~]# qemu-img info /data/nfs/rocky9.qcow2
image: /data/nfs/rocky9.qcow2
file format: qcow2
virtual size: 10 GiB (10737418240 bytes)
disk size: 196 KiB
cluster_size: 65536
Format specific information:
    compat: 0.10
    compression type: zlib
    refcount bits: 16
[root@kvm1 ~]# virsh vol-list --pool NFS --details
 Name                Path                          Type   Capacity    Allocation
----------------------------------------------------------------------------------
 centosshare.qcow2   /data/nfs/centosshare.qcow2   file   10.00 GiB   2.87 GiB
 rocky.qcow2         /data/nfs/rocky.qcow2         file   10.00 GiB   12.00 GiB
 rocky9.qcow2        /data/nfs/rocky9.qcow2        file   10.00 GiB   196.00 KiB
# 附加磁盘到centos7虚机,使用--config表示重启或者再启动后添加,默认需要虚机处于开机状态才能添加
[root@kvm1 ~]# virsh attach-disk --domain centos7 --cache none --source /data/nfs/rocky.qcow2 --target vdb --config
Disk attached successfully
# 分离存储卷
[root@kvm1 ~]# virsh detach-disk --domain centos7 --target vdb --config
Disk detached successfully
# 擦除存储卷
[root@kvm1 ~]# virsh vol-wipe --pool NFS --vol rocky.qcow2
Vol rocky.qcow2 wiped
# 删除存储卷
[root@kvm1 ~]# virsh vol-delete --pool NFS --vol rocky.qcow2
Vol rocky.qcow2 deleted
进阶
虚机的迁移
KVM虚机由XML配置我呢见和磁盘映像组成,如果虚机正在运行则还要考虑内存的迁移。按照目标宿主机的位置来分,虚机迁移分为两种:内部迁移和宿主机之间的迁移。按照虚机的状态来区分,虚机迁移分为3种:实时(虚机处于运行状态)迁移、非实时(虚机处于休眠状态)迁移和离线(虚机处于关机状态)迁移。
虚机迁移的要求:
- 尽量使用共享存储,非共享存储需要添加 –copy-storage来实现迁移;
- 对宿主机操作系统版本号有要求RHEL7.5之后可以迁移到RHEL8,反之则不可以。RHEL8各个版本可以互相迁移;
虚机迁移的限制:
- 使用直通设备的,不支持迁移
- 使用单根虚拟化设备(SR-IOV)的,不支持迁移
- 使用vGPU设备的,不支持迁移
- 需要支持NUMA
宿主机内部迁移
KVM的宿主机内部迁移无法通过cockpit或者virsh命令完成,需要手动执行:
- 使用mv迁移磁盘文件、XML配置文件
- 修改XML配置文件
- 无需重新define虚机
# Host主机有三个存储池,现将default池内的centos模板虚机迁移到KVM池
[root@kvm1 data]# virsh pool-list
 Name      State    Autostart
-------------------------------
 default   active   yes
 ISO       active   yes
 KVM       active   yes
[root@kvm1 data]# virsh list --all
 Id   Name           State
-------------------------------
 1    centos7        running
 -    centos         shut off
# 迁移磁盘文件到存储池KVM
[root@kvm1 data]# mv /var/lib/libvirt/images/centos.qcow2 /data/kvm/centos.qcow2
# 修改配置文件
[root@kvm1 data]# vim /etc/libvirt/qemu/centos.xml
# 方法一,使用file参数直接写入磁盘文件的硬路径:
    <disk type='file' device='disk'>
      <driver name='qemu' type='qcow2'/>
      <source file='/data/kvm/centos.qcow2'/>
      <backingStore/>
      <target dev='vda' bus='virtio'/>
      <address type='pci' domain='0x0000' bus='0x04' slot='0x00' function='0x0'/>
    </disk>
# 方法二,使用volume参数指定pool中的磁盘:
    <disk type='volume' device='disk'>
      <driver name='qemu' type='qcow2'/>
      <source pool='kvm' volume='/data/kvm/centos.qcow2'/>
      <backingStore/>
      <target dev='vda' bus='virtio'/>
      <address type='pci' domain='0x0000' bus='0x04' slot='0x00' function='0x0'/>
    </disk>
# 开机检查
[root@kvm1 data]# virsh start centos
Domain 'centos' started
[root@kvm1 data]# virsh list
 Id   Name      State
-------------------------
 1    centos7   running
 3    centos    running
基于共享存储迁移
# 添加防护的例外
[root@kvm1 ~]# firewall-cmd --add-service={libvirt,libvirt-tls} --permanent
[root@kvm1 ~]# firewall-cmd --add-port=49152-49215/tcp --permanent
[root@kvm1 ~]# firewall-cmd --reload
# 添加域名解析
[root@kvm1 ~]# cat /etc/hosts
127.0.0.1   localhost localhost.localdomain localhost4 localhost4.localdomain4
::1         localhost localhost.localdomain localhost6 localhost6.localdomain6
192.168.10.140	kvm1
192.168.10.141	kvm2
192.168.10.142	stor1
# 配置共享存储
# 在所有主机上运行 yum install -y nfs-utils
# 在存储主机上配置NFS
[root@stor1 ~]# vim /etc/exports
/data/nfs       192.168.10.0/24(rw,no_root_squash)
[root@stor1 ~]# systemctl enable --now nfs-server
Created symlink /etc/systemd/system/multi-user.target.wants/nfs-server.service → /usr/lib/systemd/system/nfs-server.service.
[root@stor1 ~]# systemctl enable --now rpcbind
[root@stor1 ~]# firewall-cmd --permanent --add-service=nfs
success
[root@stor1 ~]# firewall-cmd --reload
success
# 在宿主机1号上挂载nfs
[root@kvm1 ~]# mkdir /data/nfs
[root@kvm1 ~]# virsh pool-create-as NFS netfs --source-host=stor1 --source-path=/data/nfs --target=/data/nfs
# 在宿主机2号上挂载nfs
[root@kvm2 ~]# mkdir /data/nfs
[root@kvm2 ~]# virsh pool-create-as NFS netfs --source-host=stor1 --source-path=/data/nfs --target=/data/nfs
# 在宿主机上将default磁盘池中的centos虚机磁盘迁移至共享存储上
# 迁移磁盘文件到存储池KVM
[root@kvm1 ~]# mv /var/lib/libvirt/images/centos.qcow2 /data/nfs/centos-share.qcow2
[root@kvm1 ~]# virsh dumpxml centos > /etc/libvirt/qemu/centos-share.xml
# 修改配置文件
# 删除UUID并修改主机名为centos-share
[root@kvm1 ~]# vim /etc/libvirt/qemu/centos-share.xml
    <disk type='volume' device='disk'>
      <driver name='qemu' type='qcow2'/>
      <source pool='kvm' volume='/data/nfs/centos-share.qcow2'/>
      <backingStore/>
      <target dev='vda' bus='virtio'/>
      <address type='pci' domain='0x0000' bus='0x04' slot='0x00' function='0x0'/>
    </disk>
# 导入配置文件
[root@kvm1 ~]# virsh define /etc/libvirt/qemu/centos-share.xml
# 开机
[root@kvm1 data]# virsh start centos-share
Domain 'centos-share' started
# 执行动态迁移
[root@kvm1 ~]# virsh migrate --live --verbose --undefinesource --persistent centos-share qemu+ssh://kvm2/system
Migration: [100 %]
基于非共享存储迁移
非共享存储的迁移功能基于NBD方式,NetworkBlockDevice,即让用户通过网络访问块设备、设备镜像的方式,通过流将磁盘数据发送到本地或者远程。
# 添加防护的例外
[root@kvm1 ~]# firewall-cmd --add-service={libvirt,libvirt-tls} --permanent
[root@kvm1 ~]# firewall-cmd --add-port=49152-49215/tcp --permanent
[root@kvm1 ~]# firewall-cmd --reload
# 添加域名解析
[root@kvm1 ~]# cat /etc/hosts
127.0.0.1   localhost localhost.localdomain localhost4 localhost4.localdomain4
::1         localhost localhost.localdomain localhost6 localhost6.localdomain6
192.168.10.140	kvm1
192.168.10.141	kvm2
192.168.10.142	stor1

# 必须要添加--copy-storage-all参数才能复制镜像文件到非共享Host主机上
[root@kvm1 ~]# virsh migrate --live  --copy-storage-all --verbose centos qemu+ssh://192.168.10.141/system
Migration: [100 %]

[root@kvm2 ~]# virsh list
 Id   Name     State
------------------------
 14   centos   running
监控与优化
Linux性能监控及调优工具
主机性能的瓶颈要么由于错误或者非最优配置,要么业务负载重。对于前者血药调整配置,对于后者则需要扩容。而扩容有两种:
纵向扩容:使用更多的内存、更好的CPU、更快的网络
横向扩容:使用更多的节点、组件来分担负载
Linux性能监控以及调优的工具主要有:
观测工具
静态性能分析工具
基准测试工具
调优工具
sar命令
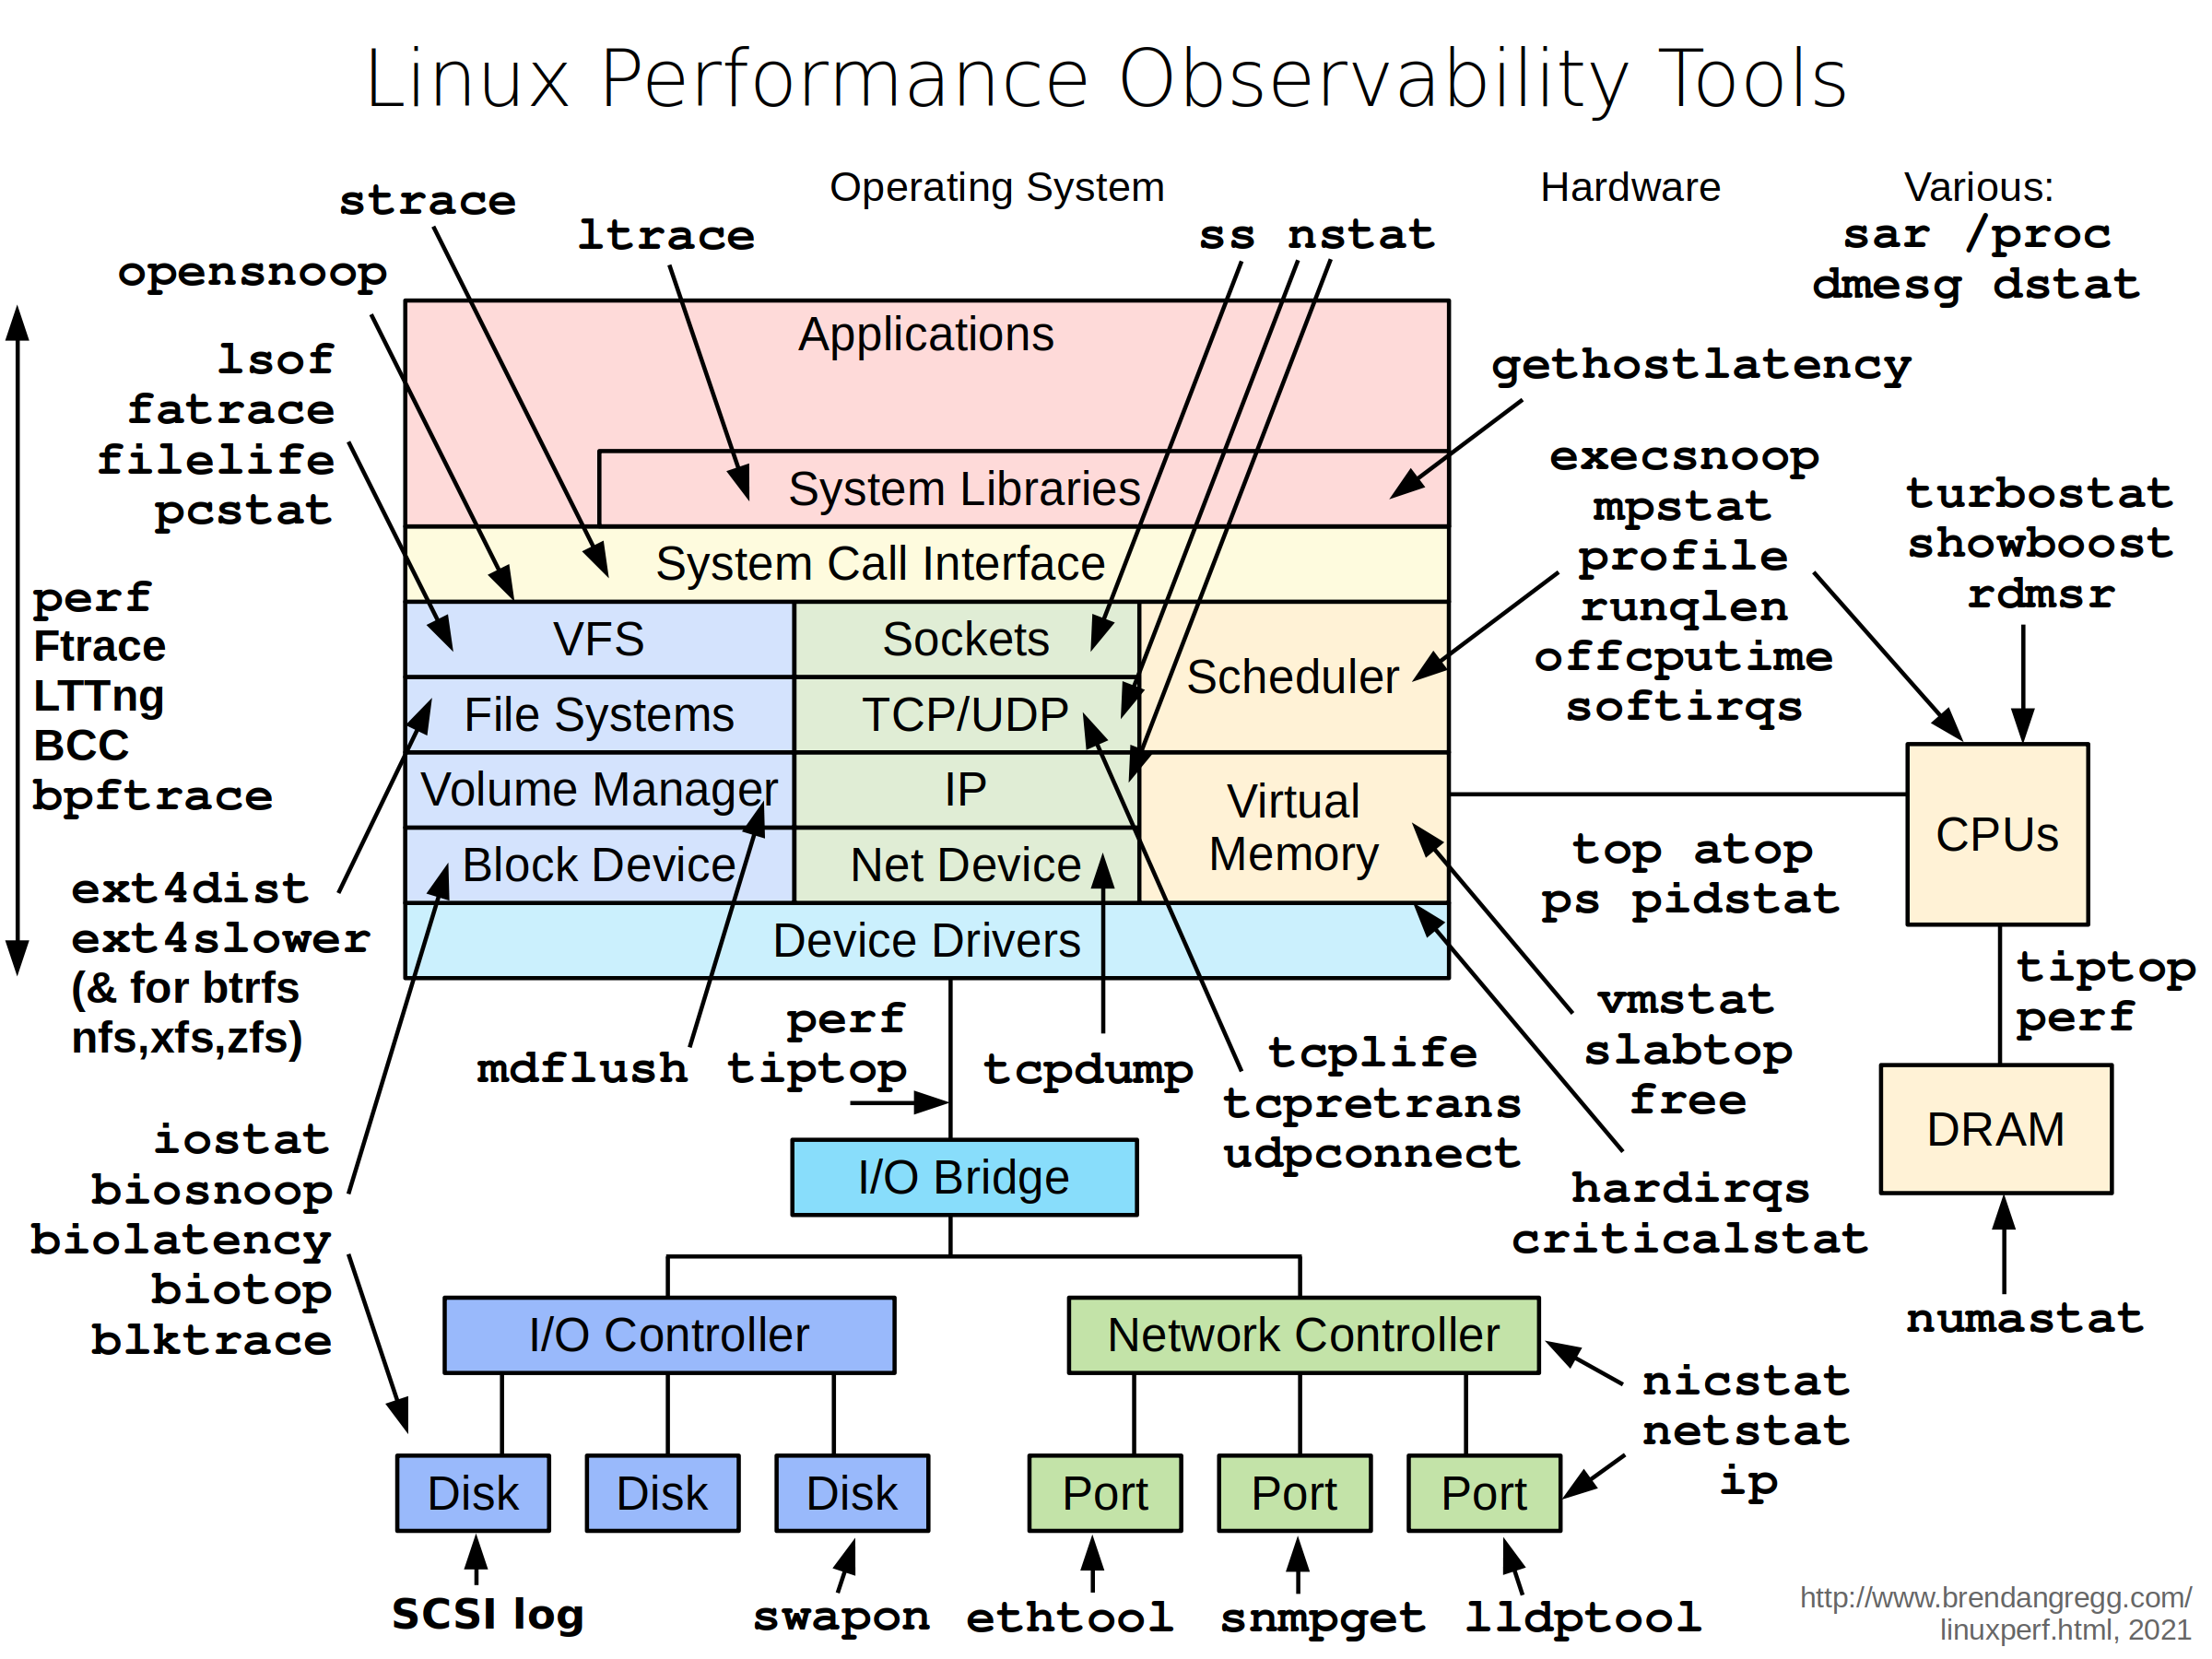
- top:显示Linux整体运行状态
- ps:显示进程状态
- uptime:显示系统运行时间
- netstat:显示网络连接、路由表、接口统计信息
- free:显示系统中可用和已用内存
- vmstat:显示虚拟内存统计信息
- sysctl:运行时配置内核参数
- tcpdump:包分析工具
- /proc目录下的文件:系统信息
- pgrep:根据名称和其他属性查找进程
- ls* 命令:获得硬件信息,例如lscpu、lsblk、lsmem、lsscisi
- tuned:针对不同业务需求快速调整系统参数
[root@kvm1 ~]# lscpu
Architecture:        x86_64
CPU op-mode(s):      32-bit, 64-bit
Byte Order:          Little Endian
CPU(s):              4
On-line CPU(s) list: 0-3
Thread(s) per core:  1
Core(s) per socket:  4
Socket(s):           1
NUMA node(s):        1
Vendor ID:           GenuineIntel
BIOS Vendor ID:      GenuineIntel
CPU family:          6
Model:               158
Model name:          Intel(R) Core(TM) i5-8300H CPU @ 2.30GHz
BIOS Model name:     Intel(R) Core(TM) i5-8300H CPU @ 2.30GHz
Stepping:            10
CPU MHz:             2303.999
BogoMIPS:            4607.99
Virtualization:      VT-x
Hypervisor vendor:   VMware
Virtualization type: full
L1d cache:           32K
L1i cache:           32K
L2 cache:            256K
L3 cache:            8192K
NUMA node0 CPU(s):   0-3
Flags:               fpu vme de pse tsc msr pae mce cx8 apic sep mtrr pge mca cmov pat pse36 clflush mmx fxsr sse sse2 ss ht syscall nx pdpe1gb rdtscp lm constant_tsc arch_perfmon nopl xtopology tsc_reliable nonstop_tsc cpuid pni pclmulqdq vmx ssse3 fma cx16 pcid sse4_1 sse4_2 x2apic movbe popcnt tsc_deadline_timer aes xsave avx f16c rdrand hypervisor lahf_lm abm 3dnowprefetch cpuid_fault invpcid_single pti ssbd ibrs ibpb stibp tpr_shadow vnmi ept vpid ept_ad fsgsbase tsc_adjust bmi1 avx2 smep bmi2 invpcid rdseed adx smap clflushopt xsaveopt xsavec xgetbv1 xsaves arat md_clear flush_l1d arch_capabilities
[root@kvm1 ~]# lsmem
RANGE                                 SIZE  STATE REMOVABLE BLOCK
0x0000000000000000-0x00000000bfffffff   3G online       yes  0-23
0x0000000100000000-0x000000023fffffff   5G online       yes 32-71

Memory block size:       128M
Total online memory:       8G
Total offline memory:      0B
[root@kvm1 ~]# lsblk
NAME              MAJ:MIN RM  SIZE RO TYPE MOUNTPOINT
sda                 8:0    0   10G  0 disk
└─vg_data-lv_data 253:2    0   10G  0 lvm
nvme0n1           259:0    0   20G  0 disk
├─nvme0n1p1       259:1    0  600M  0 part /boot/efi
├─nvme0n1p2       259:2    0    1G  0 part /boot
└─nvme0n1p3       259:3    0 18.4G  0 part
  ├─rl_rocky-root 253:0    0 16.4G  0 lvm  /
  └─rl_rocky-swap 253:1    0    2G  0 lvm  [SWAP]
[root@kvm1 ~]# lsscsi
[9:0:0:0]    disk    VMware,  VMware Virtual S 1.0   /dev/sda
[N:0:0:1]    disk    VMware Virtual NVMe Disk__1                /dev/nvme0n1
使用Tuned优化性能
Tuned可以根据不同业务需求和硬件条件,通过切换配置文件实现对需求的改变。针对虚拟化环境,有两个预安装的配置文件可以直接使用:
- virtual-host,用于宿主机,减少了虚拟内存交换,增加了磁盘预读值,并提供更积极的脏页回写
- virtual-guest,用于运行在kvm上的虚机,减少了虚拟内存交换性,增加磁盘预读值,不会禁用disk barriers
# 安装Tuned
[root@kvm1 ~]# yum install -y tuned
[root@kvm1 ~]# systemctl enable --now tuned
[root@kvm1 ~]# tuned-adm active
Current active profile: virtual-guest
[root@kvm1 ~]# tuned-adm list
Available profiles:
- accelerator-performance     - Throughput performance based tuning with disabled higher latency STOP states
- aws                         - Optimize for aws ec2 instances
- balanced                    - General non-specialized tuned profile
- desktop                     - Optimize for the desktop use-case
- hpc-compute                 - Optimize for HPC compute workloads
- intel-sst                   - Configure for Intel Speed Select Base Frequency
- latency-performance         - Optimize for deterministic performance at the cost of increased power consumption
- network-latency             - Optimize for deterministic performance at the cost of increased power consumption, focused on low latency network performance
- network-throughput          - Optimize for streaming network throughput, generally only necessary on older CPUs or 40G+ networks
- optimize-serial-console     - Optimize for serial console use.
- powersave                   - Optimize for low power consumption
- throughput-performance      - Broadly applicable tuning that provides excellent performance across a variety of common server workloads
- virtual-guest               - Optimize for running inside a virtual guest
- virtual-host                - Optimize for running KVM guests
Current active profile: virtual-guest
# 激活配置文件
[root@kvm1 ~]# tuned-adm profile aws
[root@kvm1 ~]# tuned-adm active
Current active profile: aws
VirtIO驱动
VirtIO时一种半虚拟化框架。当使用该半虚拟化驱动程序时,虚拟机操作系统会认识到它在Hypervisor上运行,其IO请求不经过虚拟化层而直接发送给QEMU提供的半虚拟化设备,通过宿主机的驱动程序发送给真实的物理硬件,以提供较高的性能。
CPU优化技术
宿主机逻辑CPU的数量时物理CPU的插槽(socket),内核(core)和线程(thread)的乘积。
- vCPU的数量
- 单个虚机的vCPU数量不能超过宿主机中逻辑CPU的总数
- 增加vCPU数量不一定能提高性能;
- KVM支持CPU超分
- vCPU的配置
- “Copy host CPU configuration”是通用配置
- “Hypervisor Default”是qemu64模式,可以让虚拟在物理CPU有差异的宿主机之间进行实时迁移
- vCPU的拓扑
- vCPU的拓扑是指设置vCPU的插槽、核心和线程数的不同比值
- 最佳策略根据需求确定所需插槽数,然后只分配一个内核和一个线程
NUMA
NUMA的出现是为了解决多CPU的协同工作和内存访问冲突的问题,CPU和内存都在相同NUMA节点内是最理想的配置。
# 系统默认不安装
[root@kvm1 ~]# yum install numactl
# 查看NUMA情况,显示一个NUMA节点中有4个vcpu、8G内存
[root@kvm1 ~]# numactl -H
available: 1 nodes (0)
node 0 cpus: 0 1 2 3
node 0 size: 7665 MB
node 0 free: 6783 MB
node distances:
node   0
  0:  10
[root@kvm1 ~]# virsh nodeinfo
CPU model:           x86_64
CPU(s):              4
CPU frequency:       2303 MHz
CPU socket(s):       2
Core(s) per socket:  2
Thread(s) per core:  1
NUMA cell(s):        1
Memory size:         7849944 KiB
[root@kvm1 ~]# virsh start centos7
Domain 'centos7' started
[root@kvm1 ~]# virsh vcpuinfo centos7
VCPU:           0    # 表示虚机CPU0放置到宿主机CPU1上
CPU:            1
State:          running
CPU time:       11.3s
CPU Affinity:   yyyy  # 表示可以放置到4个CPU上,一个y代表一个CPU

VCPU:           1
CPU:            2
State:          running
CPU time:       0.1s
CPU Affinity:   yyyy
# 将虚机CPU固定到指定节点
[root@kvm1 ~]# virsh edit centos7
# 在下面一行之后新增CPU配置信息
  <vcpu placement='static'>4</vcpu>
  <cputune>
    <vcpupin vcpu='0' cpuset='3'/>
    <vcpupin vcpu='1' cpuset='2'/>
    <vcpupin vcpu='2' cpuset='1'/>
    <vcpupin vcpu='3' cpuset='0'/>
  </cputune>
# 然后重启centos7虚机,可见CPU固定节点
[root@kvm1 ~]# virsh vcpuinfo centos7
VCPU:           0
CPU:            3
State:          running
CPU time:       14.0s
CPU Affinity:   ---y

VCPU:           1
CPU:            2
State:          running
CPU time:       2.5s
CPU Affinity:   --y-

VCPU:           2
CPU:            1
State:          running
CPU time:       2.0s
CPU Affinity:   -y--

VCPU:           3
CPU:            0
State:          running
CPU time:       2.8s
CPU Affinity:   y---
[root@kvm1 ~]# virsh vcpupin centos7
 VCPU   CPU Affinity
----------------------
 0      3
 1      2
 2      1
 3      0
在使用virt-install 部署虚机时,可以使用–cpuset来配置numa策略。
内存优化
内存分配主要考虑以下三个方面:
- 内存分配
- 内存调整
- 内存支持
优化KVM内存性能的第一条准则时不要向虚机分配过多内存。当物理机内存≤64GB时,虚机可用内存数为-2GB,当>64GB时,可用内存数为内存总量-(2+5x内存总量/64)。假设宿主机有32GB内存,则分配给虚机的内存总数为30GB;宿主机内存有256GB时,虚机可分配上限为:256-(2+0.5(256/64))=252GB.即内存不超过64GB时,为宿主机保留2GB内存;超过64GB,除了为宿主机保留2GB外,每组64GB内存应当预留512M。
内存气球是一种内存回收技术,可以在虚机运行时动态调整内存资源,而不需要关闭虚机。主流虚拟化解决方案都支持内存气泡,其中KVM通过virtiio_balloon设备实现。内存气泡只能由宿主机实现,可以通过充气操作增加气球设备所占用的虚机内存,从而将虚机空闲内存回收进行二次分配。
# 启动虚机
[root@kvm1 ~]# virsh start centos7
Domain 'centos7' started
# 宿主机可用内存6.5GB
[root@kvm1 ~]# free -h
              total        used        free      shared  buff/cache   available
Mem:          7.5Gi       358Mi       6.5Gi       9.0Mi       636Mi       6.9Gi
Swap:         2.0Gi          0B       2.0Gi
# 虚机开机正常后宿主机可用内存6.1GB
[root@kvm1 ~]# free -h
              total        used        free      shared  buff/cache   available
Mem:          7.5Gi       830Mi       6.1Gi       9.0Mi       571Mi       6.4Gi
Swap:         2.0Gi          0B       2.0Gi
# 查看虚机内存气泡情况,默认为配置的1GB
[root@kvm1 ~]# virsh qemu-monitor-command centos7 --hmp --cmd info balloon
balloon: actual=1024
# 对虚机进行充气100M内存的操作
[root@kvm1 ~]# virsh qemu-monitor-command centos7 --hmp --cmd balloon 800
# 虚机内存可用量降到800M
[root@guest ~]# free -h
              total        used        free      shared  buff/cache   available
Mem:           766M        143M        522M        6.8M        100M        499M
Swap:          1.0G          0B        1.0G
# 再次充气,将虚机内存可用量将为256M
[root@kvm1 ~]# virsh qemu-monitor-command centos7 --hmp --cmd balloon 256
[root@kvm1 ~]# virsh qemu-monitor-command centos7 --hmp --cmd info balloon
balloon: actual=256
# 虚机可用内存数量如下:
[root@guest ~]# free -h
              total        used        free      shared  buff/cache   available
Mem:           222M        134M         60M        992K         27M        3.9M
Swap:          1.0G         11M        1.0G
# 执行放气操作,
[root@kvm1 ~]# virsh qemu-monitor-command centos7 --hmp --cmd balloon 1024
# 虚拟内存恢复默认值
[root@guest ~]# free -h
              total        used        free      shared  buff/cache   available
Mem:           990M        134M        821M        976K         34M        768M
Swap:          1.0G         11M        1.0G
大页原理
内存是以页(Page)为单位进行管理,x86架构通常为4KB,适用于大多数工作负载,而对于相对固定的大型内存占用程序而已,4KB内存页的性能开销较大。HugePage可以解决这个问题,通过提高内存页大小,减小了内页表项数节省了页表所占CPU缓存空间和内存地址转换次数,从而提高内存使用效率和性能。
大页的实现方式有两种哦:静态大页(Huge TLB)和动态大页(Transparent HugePages THP).
[root@kvm1 ~]# grep -i huge /proc/meminfo
AnonHugePages:    503808 kB
ShmemHugePages:        0 kB
FileHugePages:         0 kB
HugePages_Total:       0
HugePages_Free:        0
HugePages_Rsvd:        0
HugePages_Surp:        0
Hugepagesize:       2048 kB
Hugetlb:               0 kB
网络优化
- 需要合理隔离网络流量来避免网络拥塞,避免ARP Flux现象。
net.ipv4.conf.all.arp_filter=1- 使用vrtIO驱动和vhost模块来提供接近物理设备性能的驱动
- 使用桥接零复制传输提高宿主机大数据传输性能
- 多队列virtio-net
- 直接设备分配和SR-IOV
- 调整内核参数
存储优化
- 缓存模式:
- none:无页面缓存
- writethrough:直写,数据直接落盘,使用宿主机缓存
- writeback:回写,数据落宿主机之后即报告虚机完成写入
- directsync:类似直写,但不经过缓存
- unsafe:宿主机缓存所有IO
- I/O模式
- 丢弃模式
- 检测零模式
- I/O调整
# 查看虚机的硬盘文件
[root@kvm1 ~]# virsh domblklist centos7
 Target   Source
-------------------------------------------------
 vda      /var/lib/libvirt/images/centos7.qcow2
 sda      -
# 限制硬盘iops值为100,读写吞吐量为10MB
[root@kvm1 ~]# virsh blkdeviotune centos7 vda --total-iops-sec 100 --total-bytes-sec 10MB
备份与还原
备份数据的目标是恢复数据。在恢复的过程中有2个最关键的衡量指标:
- RTO:Recovery Time Objective 指业务停止时长
- RPO:Recovery Point Objectve 指可恢复时间点,即可恢复的数据代表的业务时长,也就是用户损失的数据量。
备份的方法有两种:
- 脱机备份:冷备
- 联机备份:热备
内部快照
内部快照仅适用于QCOW2格式文件,它是磁盘快照和虚机内存状态的组合,所以也被称为检查点(Checkpoint)。KVM在创建快照的过程中,虚机会进入暂停模式,创建结束后会自动恢复运行,所以创建内部快照会导致系统中断。
# 查看快照清单
[root@kvm1 ~]# virsh snapshot-list centos7
 Name   Creation Time   State
-------------------------------
# 创建名为snap1的快照
[root@kvm1 ~]# virsh snapshot-create-as centos7 --name "snap1"
Domain snapshot snap1 created
# 关机创建snap2的快照
[root@kvm1 ~]# virsh shutdown centos7
Domain 'centos7' is being shutdown
[root@kvm1 ~]# virsh snapshot-create-as centos7 --name "snap2"
Domain snapshot snap2 created
# 再次创建snap3的快照
[root@kvm1 ~]# virsh start centos7
Domain 'centos7' started
[root@kvm1 ~]# virsh snapshot-create-as centos7 --name "snap3"
Domain snapshot snap3 created
# 查看快照的层级
[root@kvm1 ~]# virsh snapshot-list centos7 --parent
 Name    Creation Time               State     Parent
-------------------------------------------------------
 snap1   2023-05-25 17:57:30 +0800   running
 snap2   2023-05-25 17:59:43 +0800   shutoff   snap1
 snap3   2023-05-25 18:00:49 +0800   running   snap2
[root@kvm1 ~]# virsh snapshot-list centos7 --tree
snap1
  |
  +- snap2
      |
      +- snap3
# 查看快照信息,可见snap1的快照占据287M空间,snap3快照占据321M空间,这些空间是内存的dump文件。
[root@kvm1 ~]# qemu-img info /var/lib/libvirt/images/centos7.qcow2
image: /var/lib/libvirt/images/centos7.qcow2
file format: qcow2
virtual size: 10 GiB (10737418240 bytes)
disk size: 3.01 GiB
cluster_size: 65536
Snapshot list:
ID        TAG               VM SIZE                DATE     VM CLOCK     ICOUNT
1         snap1             287 MiB 2023-05-25 17:57:30 03:31:24.541
2         snap2                 0 B 2023-05-25 17:59:43 00:00:00.000          0
3         snap3             321 MiB 2023-05-25 18:00:49 00:00:45.355
Format specific information:
    compat: 1.1
    compression type: zlib
    lazy refcounts: true
    refcount bits: 16
    corrupt: false
    extended l2: false
# 在虚机关机状态下恢复快照
[root@kvm1 ~]# virsh snapshot-revert centos7 snap3
[root@kvm1 ~]# virsh list
 Id   Name      State
-------------------------
 1    centos7   running
# 在虚机运行情况下恢复关机状态的快照,并让虚机开机
[root@kvm1 ~]# virsh snapshot-revert centos7 snap2 --running
# 删除快照,直接删除父快照
[root@kvm1 ~]# virsh snapshot-delete centos7 snap1
Domain snapshot snap1 deleted
# 可见子快照升级为父快照
[root@kvm1 ~]# virsh snapshot-list centos7 --tree
snap2
  |
  +- snap3
[root@kvm1 ~]# virsh snapshot-delete centos7 snap3
Domain snapshot snap3 deleted
[root@kvm1 ~]# virsh snapshot-delete centos7 snap2
Domain snapshot snap2 deleted
[root@kvm1 ~]# virsh snapshot-list centos7 --parent
 Name   Creation Time   State   Parent
----------------------------------------
外部快照
外部快照是指在外部保存快照资源,其中包括backing_file(后备文件)指虚机原始磁盘映像(只读)、overlay_image(覆盖映像)快照映像文件(可写)。创建外部快照之后,backing_file变为只读状态,数据写入overlay_image中。
# 创建外部快照
[root@kvm1 ~]# virsh snapshot-create-as centos7 snap1 "External Snapshot1" --disk-only --atomic
Domain snapshot snap1 created
[root@kvm1 ~]# virsh snapshot-list
error: command 'snapshot-list' requires <domain> option
[root@kvm1 ~]# virsh snapshot-list centos7
 Name    Creation Time               State
----------------------------------------------------
 snap1   2023-05-25 18:18:31 +0800   disk-snapshot
# 快照位置为external
[root@kvm1 ~]# virsh snapshot-info centos7 snap1
Name:           snap1
Domain:         centos7
Current:        yes
State:          disk-snapshot
Location:       external
Parent:         -
Children:       0
Descendants:    0
Metadata:       yes
# 虚机磁盘文件变更为.snap1文件
[root@kvm1 ~]# virsh domblklist centos7
 Target   Source
-------------------------------------------------
 vda      /var/lib/libvirt/images/centos7.snap1
 sda      -
# 原始镜像文件信息,2.41GB
[root@kvm1 ~]# qemu-img info /var/lib/libvirt/images/centos7.qcow2
image: /var/lib/libvirt/images/centos7.qcow2
file format: qcow2
virtual size: 10 GiB (10737418240 bytes)
disk size: 2.41 GiB
# 快照盘文件信息,4.25M
[root@kvm1 ~]# qemu-img info /var/lib/libvirt/images/centos7.snap1
image: /var/lib/libvirt/images/centos7.snap1
file format: qcow2
virtual size: 10 GiB (10737418240 bytes)
disk size: 4.25 MiB
# 原始镜像变为只读,所有数据写入则保留到新的snap1文件中。
# 再次创建外部快照2
[root@kvm1 ~]# virsh snapshot-create-as centos7 snap2 --disk-only --atomic
Domain snapshot snap2 created
[root@kvm1 ~]# qemu-img info /var/lib/libvirt/images/centos7.snap
centos7.snap1  centos7.snap2
[root@kvm1 ~]# qemu-img info /var/lib/libvirt/images/centos7.snap2
image: /var/lib/libvirt/images/centos7.snap2
file format: qcow2
virtual size: 10 GiB (10737418240 bytes)
disk size: 196 KiB
[root@kvm1 ~]# virsh snapshot-list centos7 --parent
 Name    Creation Time               State           Parent
-------------------------------------------------------------
 snap1   2023-05-25 18:18:31 +0800   disk-snapshot
 snap2   2023-05-25 18:25:30 +0800   shutoff         snap1

[root@kvm1 ~]# virsh snapshot-list centos7 --tree
snap1
  |
  +- snap2
# 创建静默快照 --quiesce ,使开机状态的虚机在创建快照时将缓存文件同步写入磁盘
[root@kvm1 ~]# virsh snapshot-create-as centos7 snap3 --disk-only --atomic --quiesce
Domain snapshot snap3 created
# 快照链,从上到下展示快照数据的文件生成链
[root@kvm1 ~]# qemu-img info --backing-chain /var/lib/libvirt/images/centos7.snap3
image: /var/lib/libvirt/images/centos7.snap3
file format: qcow2
virtual size: 10 GiB (10737418240 bytes)
disk size: 8.44 MiB
cluster_size: 65536
backing file: /var/lib/libvirt/images/centos7.snap2
backing file format: qcow2
Format specific information:
    compat: 1.1
    compression type: zlib
    lazy refcounts: false
    refcount bits: 16
    corrupt: false
    extended l2: false

image: /var/lib/libvirt/images/centos7.snap2
file format: qcow2
virtual size: 10 GiB (10737418240 bytes)
disk size: 196 KiB
cluster_size: 65536
backing file: /var/lib/libvirt/images/centos7.snap1
backing file format: qcow2
Format specific information:
    compat: 1.1
    compression type: zlib
    lazy refcounts: false
    refcount bits: 16
    corrupt: false
    extended l2: false

image: /var/lib/libvirt/images/centos7.snap1
file format: qcow2
virtual size: 10 GiB (10737418240 bytes)
disk size: 2.5 MiB
cluster_size: 65536
backing file: /var/lib/libvirt/images/centos7.qcow2
backing file format: qcow2
Format specific information:
    compat: 1.1
    compression type: zlib
    lazy refcounts: false
    refcount bits: 16
    corrupt: false
    extended l2: false

image: /var/lib/libvirt/images/centos7.qcow2
file format: qcow2
virtual size: 10 GiB (10737418240 bytes)
disk size: 2.41 GiB
cluster_size: 65536
Format specific information:
    compat: 1.1
    compression type: zlib
    lazy refcounts: true
    refcount bits: 16
    corrupt: false
    extended l2: false
[root@kvm1 ~]# tree /var/lib/libvirt/qemu/snapshot/
/var/lib/libvirt/qemu/snapshot/
└── centos7
    ├── snap1.xml
    ├── snap2.xml
    ├── snap3.xml
    └── snap4.xml
# 当前版本不支持外部快照恢复
[root@kvm1 ~]# libvirtd --version
libvirtd (libvirt) 8.0.0
[root@kvm1 ~]# rpm -qi qemu-kvm |grep -i ^version
Version     : 6.2.0
[root@kvm1 ~]# cat /etc/redhat-release
Rocky Linux release 8.8 (Green Obsidian)
[root@kvm1 ~]# virsh snapshot-revert centos7 snap2
error: unsupported configuration: revert to external snapshot not supported yet
# 恢复外部快照只能修改手动配置文件和手动收缩磁盘。